How Much to Fix a Leaking Toilet? A Guide to Repair Costs

If you have a leaking toilet, you may be wondering how much it will cost to fix it. A leaking toilet not only wastes water but can also increase your water bills.

The cost to fix a leaking toilet depends on the cause of the leak and the extent of the damage. Let us know it with Dean Owens of Plumber Warragul.

a drain fixation

To diagnose a leaking toilet, you can check for visible signs of water around the base of the toilet or on the floor. You can also put food coloring in the toilet tank and wait to see if the water in the bowl changes color. If it does, you likely have a leak. However, it’s recommended to call a plumber to diagnose and fix the problem to avoid causing further damage.

It’s important to fix a leaking toilet as soon as possible to avoid wasting water and increasing your water bills. The cost to fix a leaking toilet can vary depending on the cause of the leak and the extent of the damage.

In some cases, it may be a simple fix such as replacing a faulty valve. In other cases, it may require more extensive repairs or even a toilet replacement.

Identifying the Source of the Leak

If you have a leaking toilet, the first step is to identify the source of the problem. This will help you determine the cost of fixing the leak and the necessary repairs.

In this section, we will discuss how to identify the source of the leak by inspecting the toilet components and testing the toilet for leaks.

Inspecting the Toilet Components

To inspect the toilet components, start by removing the tank lid and checking for any visible signs of leaks. Look for water around the base of the tank, on the floor, or on the toilet bowl. If you notice any water, dry it up with a towel and inspect the components of the toilet.

Check the flapper valve, which is responsible for controlling the water flow from the tank to the bowl. If it is worn, cracked, or damaged, it may be the source of the leak.

Also, check the fill valve, which controls the water level in the tank. If it is damaged or not functioning correctly, it may cause water to leak from the tank.

Inspect the flush valve, which is responsible for releasing water from the tank into the bowl during flushing. If it is damaged or worn, it may cause water to leak from the tank.

Finally, check the wax ring and the flange, which are located at the base of the toilet. If they are damaged or worn, they may cause water to leak from the base of the toilet.

Testing the Toilet for Leaks

To test the toilet for leaks, start by adding a few drops of food coloring to the tank. Wait for a few minutes and then check the toilet bowl. If you notice any colored water in the bowl, it means that there is a leak between the tank and the bowl. This could be due to a faulty flapper valve or an issue with the flush valve.

If you notice water around the base of the toilet, it means that there is a leak between the toilet and the floor. This could be due to a damaged wax ring or flange.

To confirm the source of the leak, you can perform a water test. Fill a bucket with water and pour it around the base of the toilet. If you notice any water seeping out, it means that there is a leak between the toilet and the floor.

Repair and Replacement Solutions

DIY Repair Tips

If you’re looking to fix a leaking toilet, there are a few DIY repair tips you can try before calling in a professional plumber.

One of the most common causes of a leaking toilet is a faulty flapper. To fix this, you’ll need to turn off the water supply valve and drain the toilet tank. Then, remove the old flapper and replace it with a new one. This is a simple fix that can be done with basic tools.

Another common cause of a leaking toilet is a worn-out wax ring seal. To replace this, you’ll need to turn off the water supply valve and drain the toilet. Then, remove the toilet from the floor and replace the wax ring seal. This is a more advanced repair that may require more tools and expertise.

When to Call a Professional Plumber

DIY repairs can save you money, but there are times when it’s best to call in a professional plumber. If you’re not comfortable working with nuts and bolts, or if you’re not sure what’s causing the leak, it’s best to call in a professional like Plumber Warragul.

A plumber can quickly diagnose the problem and recommend the best course of action. If you need replacement parts, a professional plumber can also help you find the right parts for your toilet.

They can also ensure that the parts are installed correctly, which can prevent future leaks and damage to your toilet.

In some cases, a leaking toilet may be a sign of a larger problem, such as a problem with the toilet cistern or toilet flange. A professional plumber can help you identify and fix these issues before they cause more damage to your home.
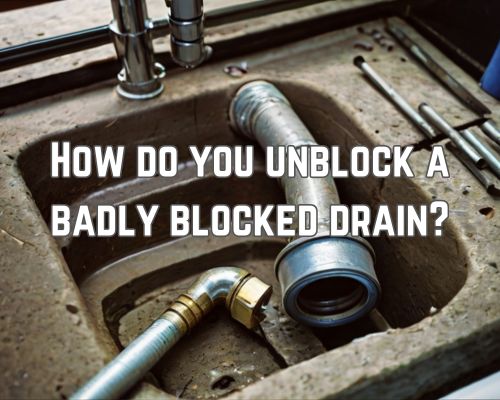
How to Unblock a Badly Blocked Drain: Tips and Tricks

Have you ever experienced a badly blocked drain? It can be a frustrating and unpleasant situation to deal with. A blocked drain can cause water to back up and overflow, resulting in potential damage to your property.

Fortunately, there are several ways to unblock a drain and prevent further damage. Let us know it with Dean Owens of Plumber Warragul.

a severely blocked drainage

One of the most common methods to unblock a drain is by using a plunger. This tool creates pressure that can dislodge the blockage and allow water to flow freely.

However, if the blockage is severe, a plunger may not be enough. In this case, you may need to try other methods such as using a drain snake or chemical drain cleaners.

It is important to note that chemical drain cleaners can be harmful to the environment and should be used with caution.

Identifying the Blockage

If you’re experiencing a badly blocked drain, it’s important to identify the cause of the blockage before attempting to unblock it. This will help you determine the best method to use and avoid causing further damage to the pipes.

Signs of a Blocked Drain

There are several warning signs that indicate a blocked drain. These include:

  • Water draining slowly or not at all
  • Gurgling sounds coming from the drain
  • Foul smell coming from the drain or surrounding area
  • Water overflowing from the drain

If you notice any of these signs, it’s likely that you have a blocked drain that needs to be cleared.

Common Causes of Blockages

There are many different things that can cause a drain to become blocked. Some of the most common causes include:

  • Hair and soap buildup in bathroom drains
  • Food waste and grease buildup in kitchen drains
  • Tree roots growing into outdoor pipes
  • Foreign objects such as toys or sanitary products being flushed down the toilet

It’s important to identify the cause of the blockage in order to prevent it from happening again in the future.

For example, if the blockage is caused by hair and soap buildup in a bathroom drain, you can prevent it from happening again by using a drain cover to catch hair and regularly cleaning the drain with a mixture of baking soda and vinegar.

Clearing the Blockage

If you have a badly blocked drain, there are several methods you can use to clear the blockage. In this section, we will explore some manual methods, chemical treatments, and professional solutions that can help you get your drain flowing again.

Manual Methods

One of the easiest ways to clear a blocked drain is to use a plunger. This tool creates suction that can help dislodge the blockage and allow water to flow freely again.

To use a plunger, place it over the drain and push down gently to create a seal. Then, pump the plunger up and down several times, being careful not to break the seal. Repeat this process several times until the blockage is cleared.

Another manual method you can try is using a drain snake. This tool is a long, flexible wire that can be inserted into the drain to dislodge the blockage.

To use a drain snake, insert it into the drain and twist it gently as you push it further in. When you encounter the blockage, twist the snake around and pull it back out, bringing the blockage with it.

Chemical Treatments

If manual methods don’t work, you can try using a chemical treatment to clear the blockage.

One popular option is to pour a mixture of baking soda and vinegar down the drain. This will create a chemical reaction that can break up the blockage and allow water to flow freely again.

Alternatively, you can use a commercial drain cleaner, but be sure to follow the instructions carefully and use protective gloves and eyewear.

Professional Solutions

If manual and chemical methods don’t work, it may be time to call in a professional plumber like Plumber Warragul.

A plumber can use CCTV cameras to inspect the inside of your pipes and locate the blockage. They can also use tools like a drain snake or coat hanger to physically remove the blockage. In more severe cases, they may recommend pipe relining or replacement.

In summary, there are several methods you can use to clear a badly blocked drain. These include manual methods like plungers and drain snakes, and chemical treatments like baking soda and vinegar. Professional solutions like CCTV inspections and pipe relining are also available. If you’re not comfortable tackling the problem yourself, don’t hesitate to call in a professional plumber to get the job done.

Can You Paint Gutters in Australia? A Guide to Painting Your Gutters in Australia

Painting your gutters can be a great way to refresh the look of your home’s exterior. But can you paint gutters in Australia? The answer is yes, you can. In fact, painting gutters is a common practice in Australia. And it can be done easily with the right tools and techniques. Let us have it with Gutter Cleaning near me.

man painting a roof gutter of a home in Australia

Before you begin, it’s important to clean your gutters thoroughly. This will ensure that the paint adheres properly and lasts longer.

You can use a pressure washer or a hose to clean your gutters. Make sure to remove any debris or dirt that may be stuck to the surface.

Once your gutters are clean, you can apply a primer to prepare the surface for painting. A single coat of primer is often enough, but you may need to apply more if your gutters are particularly worn or damaged.

Once the primer has dried, you can apply your chosen paint.

It’s important to use a paint that is suitable for outdoor use and that is designed for the material of your gutters.

Vinyl gutters, for example, require a different type of paint than aluminum or steel gutters.

You can use a brush or a sprayer to apply the paint. Be sure to apply at least two coats for a smooth, even finish.

Preparing Your Gutters for Painting

Before painting your gutters, it is important to prepare them properly to ensure that the paint adheres well and lasts longer. This section outlines the steps you should take to prepare your gutters for painting.

Cleaning and Sanding

The first step in preparing your gutters for painting is to clean them thoroughly.

You can use a detergent, soap and water, or sugar soap to remove any dirt, grime, or old paint.

If your gutters have a lot of dirt and debris, you can use a power washer to clean them. However, be careful not to damage the gutters or the surrounding area.

After cleaning, you should sand the gutters to create a rough surface that will help the paint adhere better.

Use a fine-grit sandpaper to sand the gutters lightly. Be careful not to sand too hard and remove too much material.

Choosing the Right Primer and Paint

Choosing the right primer and paint is crucial for a successful gutter painting project. The type of material your gutters are made of will determine the type of primer and paint you should use.

For aluminium gutters, you can use a clear acrylic bonding primer or a regular oil-based primer, as long as it is ammonia-free.

If your gutters are steel, you should use a primer that is specifically designed for steel. For vinyl gutters, prepare the surface with denatured alcohol before applying the primer.

When it comes to choosing the paint, you should use an exterior latex paint or an acrylic paint that is specifically designed for metal surfaces.

These types of paint are durable and can withstand harsh weather conditions.

Before applying the primer and paint, make sure the gutters are completely dry. If there is any rust on the gutters, treat it with a rust converter before applying the primer.

Applying Paint to Gutters

Painting Techniques and Tips

When painting your gutters, there are a few techniques and tips you should keep in mind to ensure a successful outcome.

First, you should choose the right paintbrush or roller for the job. A high-quality paintbrush or roller will help you achieve a smooth and even finish.

If you want to achieve a professional-looking result, you may want to consider using a paint sprayer. However, keep in mind that using a paint sprayer requires some skill and experience.

Before applying the paint, it’s important to prepare the surface properly. This includes cleaning the gutters thoroughly and ensuring they are free from any dirt, debris, or peeling paint.

If you are repainting your gutters, you should also consider applying a primer or sealant to help the paint adhere better and ensure a longer-lasting finish.

When choosing a colour for your gutters, make sure to consider the appearance and curb appeal of your home.

Lighter colours can help to reflect heat and keep your home cooler, while darker colours can help to hide dirt and grime.

You should also consider the sheen of the paint, as a glossier finish can help to make your gutters stand out and look more attractive.

Ensuring Longevity and Aesthetic Appeal

To ensure the longevity and aesthetic appeal of your newly painted gutters, it’s important to take care of them properly.

This includes avoiding harsh chemicals or abrasive cleaning methods that can damage the paint.

You should also keep an eye out for any signs of wear or fading and schedule regular repainting as needed.

If you don’t have the skill or experience to paint your gutters yourself, you may want to consider hiring a professional painter like Gutter Cleaning near me.

A professional painter can help you achieve a high-quality finish and ensure your gutters look their best for years to come.

Can You Just Replace a Few Shingles on a Roof? Expert Advice on Partial Roof Replacement

If you’ve noticed a few damaged shingles on your roof, you may be wondering if you can simply replace them instead of replacing the entire roof. The answer is: it depends. In some cases, replacing a few shingles is a viable option, while in others, it may be more cost-effective to replace the entire roof.

man replacing shingled roof

If the damage is limited to just a few shingles, and the rest of the roof is in good condition, it may be possible to replace just those shingles. This is especially true if the shingles are relatively new and still readily available. However, if the damage is more widespread, or if the roof is nearing the end of its lifespan, it may be more practical to replace the entire roof rather than trying to repair it piece by piece.

When considering whether to replace a few shingles or the entire roof, it’s important to take into account the age of the roof, the extent of the damage, and the cost of the repairs. A professional roofing contractor like Roofing West Palm Beach, can assess the damage and provide you with an estimate for both options, allowing you to make an informed decision about the best course of action for your home and budget.

Assessing Roof Damage

When assessing roof damage, be thorough and take the time to inspect your roof properly. This can help you determine whether you need to replace a few shingles or your entire roofing system. Here are some tips to help you evaluate the extent of the damage:

Identifying Shingle Damage

The first step in assessing your roof is to identify any shingle damage. This can include missing shingles, damaged shingles, or shingles that are discolored or warped. You can use binoculars to inspect your roof from the ground, or climb up to your roof if it’s safe to do so.

Evaluating the Extent of Damage

Once you’ve identified any shingle damage, you’ll need to evaluate the extent of the damage. If you only have a few missing or damaged shingles, it may be possible to replace them without replacing the entire roof. However, if the damage is more extensive, you may need to replace the entire roofing system.

Storm damage, water damage, and mold can all contribute to roof damage. If you’ve experienced a storm or heavy rain, inspect your roof for any signs of damage. Look for missing shingles, damaged shingles, or any signs of leaks or water damage in your attic.

If you have an older roof, it’s also important to inspect it regularly for signs of wear and tear. Older roofs are more susceptible to damage and may need to be replaced sooner than newer roofs.

If it is hard for you to do the extent of the damage, you can have Roofing West Palm Beach do it for you.

Executing Shingle Replacement

When replacing damaged shingles on your roof, make sure you have the right tools and materials on hand. Here are the steps you need to follow to execute shingle replacement effectively:

Gathering Necessary Tools and Materials

Before you start replacing shingles, gather the necessary tools and materials. You will need a ladder, safety gear such as gloves and a harness, a hammer, roofing nails, a flat pry bar, a utility knife, replacement shingles, roofing cement, and a caulking gun with adhesive.

Removing Damaged Shingles

To remove damaged shingles, use the flat pry bar to lift the shingle above the damaged one. Then, use the hammer and pry bar to remove the nails holding the damaged shingle in place. Once the nails are removed, slide the shingle out from under the shingle above it.

Installing New Shingles

To install new shingles, slide the replacement shingle into place and secure it with roofing nails. Apply roofing cement to the back of the shingle to ensure a watertight seal. Repeat this process for each damaged shingle.

Ensuring Quality and Prevention

To ensure the quality and prevention of future damage, check the integrity of the existing roof and underlayment. If you notice any issues, such as curling or wind uplift, it may be necessary to replace the entire roof.

Additionally, make sure to properly seal and secure the replacement shingles with roofing cement and nails. This will prevent leaks and damage caused by storms or winds.

While shingle replacement can be a DIY project, it’s often best to hire a professional roofing contractor. They have the necessary experience and tools to ensure the job is done correctly and safely.

Plus, many contractors offer warranties and insurance policies to protect your home repair investment.

By following these steps and taking the necessary precautions, you can effectively replace damaged shingles on your roof and maintain its aesthetic appeal and value.

Is it Okay to Walk on a Flat Roof? Exploring the Risks and Safety Measures

Walking on a flat roof is a common practice for homeowners and contractors alike. Whether it’s for maintenance, repair, or simply to enjoy the view, walking on a flat roof can be a necessary task.

However, the question remains: is it okay to walk on a flat roof? Let us know it with David Spade of Roofing West Palm Beach.

a durable flat roofing

The answer is not a simple yes or no. It depends on several factors, such as the type of roofing material, the age of the roof, and the weight capacity of the roof.

For example, a flat roof made of asphalt or rubber is generally safe to walk on, while a metal or fiberglass roof may not be able to support the weight of a person.

In addition to the type of roofing material, the age of the roof is also an important factor to consider. An older roof may be more prone to damage and may not be able to support the weight of a person as well as a newer roof.

It’s important to inspect the roof for any signs of damage or deterioration before walking on it. If you’re unsure about the condition of your roof, it’s best to consult with a professional roofing contractor.

Assessing Roof Safety and Preparation

Before walking on a flat roof, it is important to assess the safety of the roof and prepare accordingly.

This section will cover the key factors that you should consider before walking on a flat roof. These include the understanding of flat roof structure and materials, pre-walk inspection and identifying hazards, and safety precautions and equipment.

Understanding Flat Roof Structure and Materials

Flat roofs are common in residential and commercial buildings, and they are typically constructed with a slight slope or pitch to allow for proper drainage.

Flat roofs can be made from a variety of materials, including built-up roofing, EPDM, TPO, rubber, and other flat roofing materials.

It is important to understand the structure and materials of your flat roof to assess its safety. Flat roofs can be dangerous to walk on if they are not in good condition or have not been properly maintained.

Cracks, holes, and punctures in the roof can be hazardous and may cause you to fall through the roof.

Pre-Walk Inspection and Identifying Hazards

Before walking on a flat roof, it is important to conduct a pre-walk inspection to identify any potential hazards.

Look for debris, such as branches or leaves, that may be on the roof and could cause you to slip or lose your footing.

Check for any holes or punctures in the roof that could be dangerous.

Inspect the condition of the roof, including any cracks or other signs of wear and tear.

If you notice any dangerous conditions, such as a hole or other damage, do not attempt to walk on the roof. Instead, contact a professional roofing contractor to assess and repair the roof.

Safety Precautions and Equipment

When walking on a flat roof, it is important to take safety precautions and use the appropriate equipment.

Wear shoes with good traction to prevent slipping, and consider wearing a safety harness to prevent falling.

Use a stable ladder to access the roof, and make sure the ladder is secure and in good condition.

If you are not comfortable walking on the roof or do not have the appropriate equipment, it is best to hire a professional roofing contractor to perform the work.

Professional roofing contractors have the experience and equipment necessary to safely walk on a flat roof and identify any potential hazards.

Walking on a Flat Roof

Walking on a flat roof can be necessary for various reasons, including maintenance and repair work. However, it is important to take necessary precautions to avoid any accidents.

In this section, we will discuss the best practices for foot traffic on a flat roof and the maintenance and repair considerations.

Best Practices for Foot Traffic

When walking on your roof, it is important to wear stable and slip-resistant shoes. Avoid wearing high heels, sandals, or shoes with smooth soles.

Instead, wear shoes with rubber soles that provide good traction.

Before walking on your roof, inspect it for any damage or weak spots.

Check for any loose roofing felt, glass, plastic, or fiberglass. Also, make sure that the gutter, vents, skylights, and drains are clear of any debris.

When scaling a ladder, ensure that you place it on a secure base with a slope of 4-to-1.

Additionally, allow the top of the ladder to extend three feet above the top of the roof. This setup reduces the risk of slipping and falling when ingressing and egressing.

While walking on the roof, distribute your weight evenly and avoid stepping on the edges or corners of the roof.

If possible, walk on the joists or support beams rather than the roofing material itself.

Maintenance and Repair Considerations

Walking on a flat roof can cause damage if not done correctly. Therefore, it is important to take necessary precautions to avoid any damage to the roofing system.

When walking on your roof, avoid dragging heavy objects or tools that can puncture or damage the roofing material. Also, avoid walking on the roof during extreme weather conditions such as heavy rain, ice, or snow.

If you notice any damage to the roofing material while walking on your roof, repair it as soon as possible. Delaying the repair can cause further damage and increase the repair costs. If you cannot do the repair work, you can have Roofing West Palm Beach do it for you.

What is a Private Investigator? A Simple Definition and Explanation

If you’re curious about what a private investigator is, you’re not alone. Private investigators, also known as PIs, are professionals who are hired to gather information and investigate cases for individuals, organizations, and businesses.

In simple terms, private investigators like Ali Private Investigator Tampa are like detectives who work outside of law enforcement agencies.

a private investigator

Private investigators can be hired for a variety of reasons, including to investigate infidelity, locate missing persons, conduct background checks, and gather evidence for civil or criminal cases.

They use a combination of surveillance, research, and interviewing skills to collect information and solve cases. Private investigators may work independently or as part of a larger investigative agency.

To become a private investigator, you typically need to have a background in law enforcement or a related field, although some states and countries have different requirements.

Private investigators must also have a license to practice in most jurisdictions. If you’re interested in pursuing a career as a private investigator, it’s important to research the requirements in your area and gain relevant experience and education.

Understanding the Role of a Private Investigator

Private investigators are professionals who are hired to gather information, uncover evidence, and provide detailed reports on a wide range of matters. Their role revolves around conducting investigations on behalf of individuals, businesses, or organizations.

In this section, we will explore the different services and expertise provided by private investigators, the types of investigations they conduct, and the legal and ethical considerations they must adhere to.

Services and Expertise

Private investigators like Ali Private Investigator Tampa offer a wide range of services and expertise to their clients. They can gather information, conduct research, perform surveillance, conduct background checks, and conduct interviews.

They are skilled at analyzing and interpreting information, and they can provide detailed reports that are easy to understand.

Types of Investigations

Private investigators conduct various types of investigations, including criminal investigations, insurance investigations, civil investigations, and internal investigations.

They use a variety of investigative techniques, including skip tracing, undercover work, and computer forensics. They also investigate cases involving fraud, missing persons, theft, and identity theft.

Legal and Ethical Considerations

Private investigators must adhere to strict legal and ethical considerations. They must obtain a private investigation license and maintain a clean criminal record.

They must also adhere to jurisdictional laws and regulations and ensure that their investigations do not violate the privacy rights of individuals.

They must also ensure that their investigative techniques do not cause undue harm to the subjects under investigation.

Working in Private Investigation

If you are interested in working as a private investigator, there are certain qualifications and skills you will need to possess. Additionally, there are various employment opportunities and specializations within the profession that you can pursue.

In this section, we will explore the qualifications and skills needed to become a private investigator, as well as the different types of employment and specializations available in the field. We will also provide some historical and contemporary context for private investigation as a profession.

Qualifications and Skills

To work as a private investigator, you will need to have a high school diploma or GED. However, many employers prefer candidates who have a degree in a related field, such as criminology or criminal justice.

In addition to formal education, you will need to have certain skills and qualities to be successful in this profession. These include:

  • Attention to detail: Private investigators must be meticulous in their work, paying close attention to even the smallest details.
  • Communication skills: Investigators need to be able to communicate effectively with clients, witnesses, and other professionals.
  • Analytical skills: Private investigators must be able to analyze information and draw conclusions based on that information.
  • Discretion: Investigators often deal with sensitive information and must be able to maintain confidentiality.
  • Physical fitness: Some investigations require surveillance or other physical activities, so investigators must be in good physical condition.

Employment and Specializations

Private investigators can be hired by individuals, businesses, organizations, or law enforcement agencies. Some common areas of specialization within the profession include:

  • Corporate investigation: Investigators in this field work for businesses and organizations to investigate issues such as fraud, theft, and employee misconduct.
  • Private security: Some investigators work in private security, providing protection for individuals or businesses.
  • Domestic investigation: Investigators in this field work on cases such as infidelity, child custody, and missing persons.
  • Legal investigation: Investigators in this field work with lawyers and law firms to gather evidence for legal cases.

How Many Layers Does a Commercial Roof Have? A Comprehensive Guide

Based on commercial roofing contractors nj “When it comes to commercial roofing, there are several important factors to consider. One of these factors is the number of layers that make up the roof. Understanding the layers of a commercial roof is crucial for property owners and managers, as it can impact the durability and longevity of the roof.”

man checking out the roofings on the commercial building

So, how many layers does a commercial roof have? The answer can vary depending on the type of roofing system being used. For example, a typical built-up roof may have three to five layers, while single-ply roofing systems typically have only one layer. The number of layers can also depend on the specific materials being used, as well as the design and structure of the building.

Composition and Structure of Commercial Roofing

When it comes to commercial roofing, there are several layers that make up the overall structure. Each layer plays an important role in protecting your building from the elements, as well as providing insulation and durability.

In this section, we’ll take a closer look at the composition and structure of commercial roofing. We’ll cover the layered materials and their functions, insulation and decking, and surface and protective layers.

Layered Materials and Their Functions

The layered materials of a commercial roof generally include a substrate, insulation, and a protective layer.

The substrate is typically made of plywood or another type of decking material, and provides the foundation for the roof. Meanwhile, the insulation layer helps to regulate temperature and prevent heat loss. It can be made of various materials such as fiberglass or foam.

Finally, the protective layer is what provides the waterproofing and durability of the roof. It can be made of materials such as built-up roofing (BUR), modified bitumen, asphalt shingles, metal panels, or even concrete or clay tiles.

Insulation and Decking

The insulation layer of a commercial roof is crucial for maintaining a comfortable interior temperature and reducing energy costs.

Common insulation materials include fiberglass, foam, and polymers. These can be installed in various thicknesses depending on the desired R-value.

Meanwhile, the decking layer, or substrate, provides the base for the insulation and protective layers.

Typically made of plywood or other materials, the decking layer must be properly installed and sealed to prevent moisture from penetrating the roof system.

Surface and Protective Layers

The surface and protective layers of a commercial roof are what provide the waterproofing and durability of the system.

Built-up roofing (BUR) is a common type of surface layer, consisting of multiple layers of asphalt and felt or fabric. It is often topped with a layer of gravel for added protection.

Modified bitumen is another popular surface layer, consisting of a single-ply membrane that is reinforced with fiberglass or polyester.

Metal panels are a durable and long-lasting option for commercial roofing, and can be made of materials such as tin, copper, or aluminum.

Finally, asphalt shingles, concrete or clay tiles, and wood shakes are all popular choices for commercial roofing, depending on the desired aesthetic and durability.

Maintenance, Repair, and Replacement

Maintaining and repairing your commercial roof is essential to ensure its longevity and safety. Regular inspections and maintenance can help identify and address damage before it becomes a major problem.

With commercial roofing contractors nj, we’ll discuss how to extend the lifespan of your roof and enhance its performance through proper maintenance, repair, and replacement.

Identifying and Addressing Damage

Regular roof inspections are critical for identifying and addressing damage. Tears, punctures, and other signs of wear and tear should be addressed as soon as possible to prevent further damage.

If you notice any damage to your roof, make sure to get it repaired by a professional roofing contractor with experience in commercial roofing work.

Extending Lifespan and Enhancing Performance

There are several ways to extend the lifespan of your commercial roof and enhance its performance. Reinforcement can help make your roof more durable and better able to withstand wind, weight, and other risks.

Choosing the right roofing material for your building is also important. Organic roofing materials, such as tar and gravel, can be heavier and more vulnerable to damage than synthetic materials like TPO, EPDM, and PVC.

Proper installation and maintenance of solar panels can also help extend the lifespan of your roof. However, ensure that the installation of solar panels doesn’t damage your roof or create fumes that could be harmful to your building or its occupants.

When it comes to maintenance, regular inspections and cleaning can help prevent damage and extend the lifespan of your roof.

It’s also important to follow industry standards and manufacturer warranty requirements to ensure that your roof stays safe and functional.

If your roof does need to be replaced, it’s important to choose a reputable roofing contractor with experience in commercial roofing work. Look for a contractor with a strong warranty and a track record of quality workmanship to ensure that your new roof will last for years to come.

Will Roofing Costs Decrease in 2024? A Look at Industry Trends and Predictions

If you’re planning to replace or install a new roof in 2024, you may be wondering if roofing costs will go down. See it in commercial roofing companies nj.

house in need of roof replacement

The cost of roofing materials and construction pricing has been on the rise in recent years. This has caused concerns among homeowners and commercial building owners alike. However, predicting future roofing costs can be challenging due to various factors that can influence the market.

According to a recent study, the average cost of a roof replacement in the US ranges from $9,000 to $17,600 for a 2,000-2,200 sq. ft. roof on a single-family house up to two-stories high. The cost of a new roof depends on various factors, such as the type of roofing material, the size of the roof, the complexity of the installation, and the location of the property. While the cost of roofing materials has been on the rise, there are some factors that could potentially lead to a decrease in roofing costs in 2024.

One factor that could influence roofing costs in 2024 is the state of the economy. Economic downturns can lead to a decrease in demand for roofing services, which could lead to lower prices. Additionally, advancements in technology and changes in the roofing industry could lead to more efficient and cost-effective roofing solutions.

While it’s difficult to predict exactly how roofing costs will change in 2024, understanding the factors that influence the market can help you make informed decisions when it comes to your roofing needs.

Factors Influencing Roofing Costs in 2024

When it comes to roofing costs in 2024, there are several factors that will influence the prices you can expect to pay for roofing services. Here are some of the most significant factors that will impact roofing costs in 2024:

Material Costs and Availability

The cost and availability of roofing materials will continue to be a major factor that affects roofing costs in 2024.

The prices of roofing materials, such as asphalt shingles, metal roofing, and underlayment, can be affected by various factors, including the cost of oil, inflation, and natural disasters. For instance, hurricanes and hailstorms can cause a temporary increase in roofing material prices due to supply chain disruptions and increased demand.

Labor Market Dynamics

The cost of labor is another significant factor that will impact roofing costs in 2024.

The availability of skilled roofing contractors or commercial roofing companies nj, their level of experience, and the cost of labor will all play a role in determining the final cost of your roofing project. Moreover, the pandemic has caused some changes in the labor market, including the adoption of safety protocols, which may affect the cost of labor in the long run.

Economic and Environmental Factors

Economic and environmental factors can also influence roofing costs in 2024.

Inflation, for example, can cause the prices of roofing materials and labor to increase over time. Additionally, the shift towards sustainable and eco-friendly roofing solutions may impact the prices of roofing materials in the future.

Considerations for Homeowners

When it comes to roofing, homeowners have a lot to consider. Here are some important factors to keep in mind before deciding whether to repair or replace your roof.

Roof Replacement vs. Repair

Before making any decisions, it’s important to determine whether your roof needs a full replacement or just a repair.

If your roof is relatively new and only has minor damage, a repair may be all that’s needed. However, if your roof is older or has sustained significant damage, a full replacement may be necessary.

Additional Costs and Savings

In addition to the cost of a new roof or roof replacement, there are other expenses to consider.

For example, the size and pitch of your roof can affect the cost of the project. Additionally, the location of your home, design choices, and accessories like skylights and chimneys can all impact the final cost.

It’s also important to factor in the long-term savings of a new roof. A durable, high-quality roof can help reduce energy costs and prevent costly repairs down the line. Some manufacturers also offer warranties that can provide additional protection and peace of mind.

Regular Maintenance and Inspections

Regular maintenance and inspections can help extend the life of your roof and prevent costly repairs.

It’s important to have your roof inspected by a professional at least once a year, and to address any issues as soon as they arise. Regular cleaning and removal of debris can also help prevent damage and prolong the life of your roof.

Permits and Clean-Up Costs

Before beginning any roofing project, it’s important to obtain any necessary permits and to factor in clean-up costs.

A reputable roofing contractor should be able to provide a detailed breakdown of all costs associated with your project, including any necessary permits and clean-up fees.

Discounts and Workmanship Warranties

Finally, it’s important to choose a reputable roofing contractor who offers a workmanship warranty. This can provide additional protection and peace of mind in the event that any issues arise after the project is complete.

Additionally, some contractors may offer discounts or financing options to help make the project more affordable.

By considering these factors and working with a reputable roofing professional, you can make informed decisions for your roofing project and ensure that your home is protected for years to come.

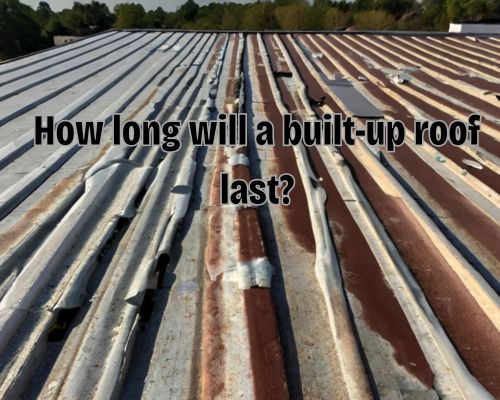
How Long Will a Built-Up Roof Last? A Comprehensive Guide

When it comes to commercial roofing, built-up roofing (BUR) is a popular choice due to its durability and longevity. However, as a property owner or manager, you may be wondering: how long will a built-up roof last? Get to know it with the biggest roofing company in the us.

The answer depends on a variety of factors. With proper installation and maintenance, a BUR can last anywhere from 20 to 40 years.

metal commercial roofing

One of the main factors that affects the lifespan of a built-up roof is the number of layers, or plies, it has. Each layer can add approximately five years of life to the roof, but no system will have less than three layers.

Additionally, the quality of installation can impact the longevity of the roof. A well-installed BUR system can last up to 30 years, whereas a poorly installed one may only last 10 to 15 years.

It’s also important to note that regular maintenance and inspections can extend the lifespan of a built-up roof. Small issues, such as cracks or leaks, can be addressed before they turn into major problems that require a full roof replacement.

By keeping up with maintenance and addressing issues promptly, you can maximize the lifespan of your BUR and avoid costly repairs down the line.

Fundamentals of Built-Up Roofing

Composition and Types

Built-up roofing (BUR) is a type of roofing system that consists of multiple layers of reinforcing fabric, ply sheets, and bitumen. The layers are typically bonded together with hot asphalt or tar.

The top layer of the roof is usually covered with gravel or other types of aggregate to protect it from the sun and weather.

There are different types of built-up roofing systems, but the most common ones are the traditional and modified bitumen systems.

The traditional BUR system is made up of alternating layers of bitumen and reinforcing fabric. Meanwhile, the modified bitumen system uses a combination of asphalt and rubber modifiers to improve its performance.

Comparing Lifespans of Roofing Materials

When it comes to comparing the lifespans of roofing materials, built-up roofing systems are known to last longer than many other types of roofing materials.

For instance, asphalt shingles typically last between 15 and 30 years, while metal roofs can last up to 50 years.

Concrete and clay tiles can last up to 50 years as well, while slate and wood roofs can last up to 100 years.

Built-up roofing systems, on the other hand, can last up to 30 years or more, depending on the quality of installation and the number of layers (or plies) the roof has. Each layer can add approximately five years of life to the roof, but no system will have less than three layers.

Modified bitumen roofing systems can also last up to 30 years, while single-ply roofing systems such as TPO and EPDM can last up to 20 years.

However, the actual lifespan of a roofing system depends on various factors such as the quality of installation, maintenance, and weather conditions. See biggest roofing company in the us.

Maximizing the Longevity of a Built-Up Roof

To ensure that your built-up roof lasts as long as possible, there are a few key steps you can take. Proper installation and maintenance are crucial, as is recognizing and addressing common issues.

Proper Installation and Maintenance

The quality of installation is one of the most important factors in determining the longevity of your built-up roof. It is essential that you hire a reputable contractor who has experience with this type of roofing system.

Poor installation can lead to a host of problems, including leaks, blisters, and waves.

In addition to proper installation, regular maintenance is key to maximizing the lifespan of your built-up roof.

This includes regular cleaning to remove debris and dirt, as well as inspections to identify any potential issues before they become major problems.

You should also address any necessary repairs promptly to prevent further damage.

Recognizing and Addressing Common Issues

There are several common issues that can affect the lifespan of your built-up roof. These include blisters, cracks, and open joints. These issues can allow water to seep in and cause damage. UV rays and weather conditions can also take a toll on your roof, causing it to deteriorate over time.

To address these issues, have your roof inspected regularly by a professional. They can identify any potential problems and recommend the appropriate repairs. In addition, you may want to consider adding a reflective coating or surfacing materials to your roof to help protect it from the sun’s rays and extend its lifespan.

Proper ventilation and insulation are also important factors in maximizing the longevity of your built-up roof. Attic ventilation can help prevent ice dams and maintain proper temperature and moisture levels. Meanwhile, insulation can help improve energy efficiency and prevent heat loss.

While built-up roofs are known for their durability and longevity, they do require effective care and maintenance to ensure they last as long as possible. By following these tips and working with a reputable contractor, you can help extend the lifespan of your built-up roof and avoid the costs of a new roof for up to 40 years.

How to Achieve an Expensive Look for Your Cabinets

“If you’re looking to give your kitchen a facelift without breaking the bank, upgrading your cabinets is a great place to start. Even if you’re on a tight budget, there are simple and affordable ways to make your cabinets look more expensive.” said Leona Rodriguesi of Mornington cabinet maker.

A luxurious kitchen with sleek, high-quality cabinets, adorned with elegant hardware and under-cabinet lighting for a sophisticated and expensive look

With a few clever tricks and a bit of DIY know-how, you can transform your kitchen into an expensive-looking space that will impress your guests.

One of the easiest ways to make your cabinets look more expensive is to paint them. A fresh coat of paint can instantly update the look of your cabinets and make them look brand new.

Choose a high-quality paint in a classic, neutral shade like white or cream to create a timeless look that won’t go out of style. If you’re feeling bold, you could also go for a darker shade like navy blue or forest green to add some drama and sophistication to your kitchen.

Another way to upgrade your cabinets is to change the hardware. Swapping out your old, dated knobs and handles for new, stylish ones can make a big difference in the overall look of your cabinets.

Choose hardware in a finish that complements the rest of your kitchen decor, such as brushed nickel or brass. You could also opt for unique hardware that makes a statement, like crystal knobs or leather handles.

With these simple upgrades, you can create an expensive-looking kitchen without spending a fortune.

Enhancing Cabinet Aesthetics

If you’re looking to enhance the aesthetics of your kitchen cabinets, there are several ways you can achieve a more elevated, custom look. With Leona Rodriguesi of Mornington cabinet maker, we’ll cover some key strategies to help you achieve a more modern, sleek appearance for your cabinets.

Choosing the Right Paint

One of the easiest and most cost-effective ways to give your cabinets a new look is to repaint them.

When choosing a paint color, consider the overall style and color scheme of your kitchen.

If you’re looking for a more luxurious, high-end look, consider opting for darker, richer colors like navy blue or charcoal gray. These shades can give your cabinets a sophisticated, elegant feel that is sure to impress.

Upgrading Hardware

Another way to enhance the look of your cabinets is to upgrade your hardware.

Swapping out your old knobs and handles for new ones can give your cabinets a fresh, updated look.

When choosing new hardware, consider the finish you want. Brass and nickel are popular choices that can add a touch of elegance to your cabinets.

Incorporating Luxurious Finishes

Finally, consider incorporating luxurious finishes like molding, crown molding, and trim.

These finishes can add texture and depth to your cabinets, giving them a more custom, high-end look.

When choosing finishes, consider the overall style of your kitchen and choose finishes that complement that style.

Strategic Kitchen Design Elements

When it comes to making your kitchen cabinets look more expensive, there are several strategic design elements that can help you achieve the desired effect.

Effective Lighting Solutions

Lighting is an essential element of any kitchen design, and it can have a significant impact on the overall look and feel of your space.

Consider incorporating a combination of task lighting, such as under-cabinet lighting, and decorative lighting, such as pendants or light fixtures, to create visual interest and depth.

Maximising Layout and Functionality

Maximizing the layout and functionality of your kitchen can also help to make your cabinets look more expensive.

Consider incorporating an island or peninsula to create additional storage and counter space. You can also experiment with different countertop materials, such as stone or oak, to create a more bespoke and modern look.

Accessorising and Decluttering

Accessorising your kitchen with personality-rich dishware, window treatments, and fabric can also elevate the look of your cabinets. However, it is important to keep clutter to a minimum. Also, ensure that your cleaning supplies are stored out of sight.

Consider incorporating peel-and-stick tiles or shape accents to create visual contrast and interest.

By incorporating these design elements into your kitchen, you can create a more expensive and luxurious look without breaking the bank. Whether you’re embarking on a DIY project or a full-scale remodel, these tips can help you achieve the look you desire.