What is the Standard Size Gutter for a House? A Comprehensive Guide

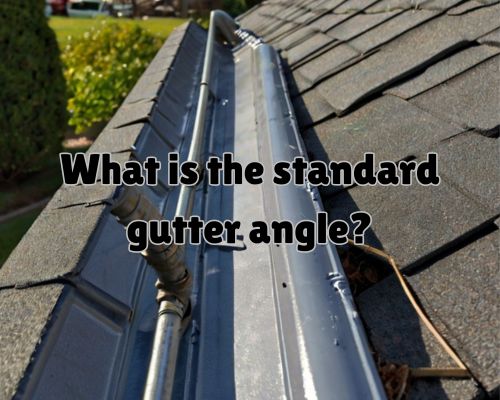
When it comes to maintaining your home, gutters are a crucial component that help protect your property from water damage. But if you’re in the market for new gutters, you may be wondering what size is right for your house.

The standard size gutter for a house can vary depending on a few factors, including the size of your roof and the amount of rainfall your area receives. Let us know more with Gutter Cleaning near me.

a house with standard size of gutters

Typically, residential gutters come in two standard sizes: 5 inches and 6 inches. The 5-inch gutter is the most common and is suitable for most homes with a pitched roof. However, if you live in an area with heavy rainfall, a 6-inch gutter may be a better option to handle the increased water flow.

It’s important to note that larger gutters can handle more water, but they may also be more expensive to install.

Understanding Gutter Dimensions

When it comes to selecting the right gutter size for your house, there are a few factors that you need to consider. With Gutter Cleaning near me, we will discuss the common gutter styles and sizes, as well as the factors that influence gutter size selection.

Common Gutter Styles and Sizes

There are two common gutter styles: K-style and half-round gutters. K-style gutters are flat on one side and have a decorative curve on the other. Meanwhile, half-round gutters are rounded on the bottom and are often used on historic homes.

The most common gutter sizes for residential homes are 5-inch and 6-inch gutters. 5-inch gutters are suitable for homes with a smaller roof area, while 6-inch gutters are recommended for larger roofs. On the other hand, half-round gutters typically have a diameter of 5 inches.

Factors Influencing Gutter Size Selection

The size of your gutter system depends on several factors, including the size of your roof, the pitch of your roof, the maximum rainfall intensity in your area, and the drainage area of your gutters.

The size of your roof is an important factor in determining the size of your gutters. The larger the roof area, the larger the gutters you will need to ensure proper drainage.

The pitch of your roof is also important, as steeper roofs require larger gutters to handle the increased volume of water.

Next, the maximum rainfall intensity in your area is another important factor to consider. The intensity of rainfall can vary greatly depending on your location, and you will need to select gutters that can handle the maximum expected rainfall.

Finally, the drainage area of your gutters is an important factor to consider. The drainage area is the total area that your gutters will be responsible for draining, and you will need to select gutters that can handle the expected volume of water.

Optimizing Gutter Performance

Calculating the Right Gutter Size

When it comes to optimizing the performance of your gutters, the first step is to make sure that they are properly sized. The size of your gutters will depend on a variety of factors, including the square footage of your roof, the pitch of your roof, and the amount of rainfall you receive in your area.

To calculate the right size gutter for your home, you can use a gutter size calculator. This tool will take into account the square footage of your roof and the pitch factor to determine the adjusted square footage of your roof. From there, you can use a chart to determine the appropriate gutter size for your home.

It’s important to note that if your roof has multiple drainage areas, you should always go for the biggest gutter size to ensure proper water flow.

Installation and Maintenance Considerations

Once you have the right size gutters for your home, it’s important to properly install and maintain them to ensure optimal performance. Here are some considerations to keep in mind:

  • Make sure that your downspouts are properly sized to handle the amount of water that your gutters are collecting. A general rule of thumb is to place downspouts every 35 feet for standard gutter sizes.
  • K-style gutters have a larger capacity than half-round gutters, so if you’re in an area with heavy rainfall, you may want to consider using K-style gutters.
  • Installing gutter guards can help prevent clogs and debris buildup in your gutters, which can lead to water damage.
  • While it is possible to install gutters yourself, it’s important to have the right tools and knowledge to ensure that they are properly installed. If you’re not confident in your abilities, it’s best to hire a professional.
  • To ensure optimal performance, it’s important to regularly clean your gutters and check for any damage or leaks. This can help prevent water damage to your home.

Best Plumbing Tool to Unblock Your Clogged Toilet: A Comprehensive Guide

“Are you struggling with a blocked toilet and wondering which plumbing tool to use to unblock it? You’re not alone. A clogged toilet can be a frustrating and unpleasant experience, but the good news is that there are several plumbing tools available that can help you unclog your toilet quickly and easily.” said Dean Owens of Plumber Warragul.

a plumber  having his tools

The appropriate plumbing tool to use to unblock your clogged toilet depends on the severity of the blockage. For minor clogs, you may be able to use a plunger to clear the obstruction. However, if the blockage is more severe, you may need to use a plumbing snake or auger to remove the obstruction. In some cases, you may even need to call in a professional plumber to help you unblock your toilet.

In this article, we will explore the different plumbing tools that you can use to unblock your toilet and provide you with some tips on how to use them effectively. Whether you’re dealing with a minor clog or a more severe blockage, we’ve got you covered. So, let’s get started and learn how to unblock your toilet like a pro!

Identifying the Right Tool for the Job

When faced with a clogged toilet, it’s important to have the right tools to tackle the blockage effectively. Here are some options to consider:

Plungers: The First Line of Defence

A plunger is a common tool used to clear clogs in toilets, sinks, and drains. It works by creating suction and pressure to dislodge the blockage. A toilet plunger is specially designed with a flange that fits snugly into the toilet bowl to create a seal.

To use a plunger, first, make sure there is enough water in the bowl to cover the plunger’s rubber cup. Then, place the plunger over the drain and push down and up rapidly to create suction. Repeat this several times until the blockage is cleared.

Plumbing Snakes and Wire Hangers: Tackling Stubborn Blockages

If a plunger doesn’t work, you may need to use a plumbing snake or a wire hanger. A plumbing snake, also known as a drain auger, is a long, flexible cable with a corkscrew-like end that can navigate through bends and curves in the pipe. To use a plumbing snake, insert it into the drain and turn the handle to push it through the blockage.

A wire hanger can also be used as a makeshift plumbing snake. Straighten out the hanger and bend one end into a hook. Insert the hook into the drain and twist it around to break up the blockage.

Alternative Solutions: DIY Fixes and Natural Agents

If you don’t have a plunger, plumbing snake, or wire hanger on hand, there are still some DIY fixes and natural agents you can try. Hot water, vinegar, baking soda, detergent, and Epsom salt are all common household items that can help dissolve and break up blockages.

To use hot water, simply pour a pot of boiling water into the toilet bowl. For vinegar and baking soda, mix equal parts of each and pour the solution into the bowl. Let it sit for a few minutes before flushing. For detergent, add a few squirts to the bowl and let it sit for a few minutes before flushing. For Epsom salt, add a few tablespoons to the bowl and let it sit for a few hours before flushing.

Preventative Measures and Maintenance

Regular Cleaning and Maintenance

Prevention is always better than cure, and this is especially true when it comes to your plumbing system. Regular cleaning and maintenance can go a long way in preventing toilet clogs and other plumbing issues.

One of the most important things you can do is to clean your toilet regularly. Use a toilet bowl cleaner and a brush to scrub the inside of the bowl and remove any buildup that may be present.

Another important step is to properly dispose of sanitary products, such as cotton balls, cotton swabs, diapers, and other items that should not be flushed down the toilet. These items can cause blockages in your plumbing system, leading to gurgling sounds, slow drainage, and other issues.

Proper Disposal of Sanitary Products

To prevent clogs, it’s important to dispose of sanitary products properly. This means throwing them in the garbage instead of flushing them down the toilet.

You should also avoid flushing inappropriate items, such as food particles, down the drain. These items can accumulate in the trap and cause blockages.

If you have hard water, you may also need to take additional steps to prevent clogs. Hard water can cause mineral buildup in your plumbing system, which can lead to clogs. Installing a water softener can help prevent this issue.

If you do experience a clog, it’s important to address the issue promptly. You may be able to fix the problem yourself using a plunger, hot water trick, or enzyme cleaner.

However, if the clog is severe or you are experiencing other plumbing issues, it’s best to call a professional plumber like Plumber Warragul, to address the problem.

What is the Standard Gutter Angle? A Comprehensive Guide

When it comes to maintaining your home, gutters are an essential component to keep in good condition. They help direct water flow away from your roof and foundation, preventing damage and costly repairs.

One important aspect to consider when installing or repairing gutters is the angle or slope of the gutter.

a gutter with standard angle

The standard gutter angle is typically a 1/4 inch slope for every 10 feet of gutter. This means that for a 40-foot gutter run, the gutter should be sloped down 1 inch from one end to the other to ensure proper water flow.

However, the exact angle may vary depending on the specific needs of your home and climate.

Proper gutter slope is crucial for ensuring that water flows freely through the gutter system and away from your home. Without proper slope, water can pool in the gutters, leading to damage to the gutter system, roof, and potentially the foundation of your home.

It’s important to have a professional assess your gutter slope to ensure that it’s at the appropriate angle for your specific home and location, see Gutter Cleaning near me.

Understanding Gutter Slope

Fundamentals of Gutter Slope

Gutter slope refers to the angle at which gutters are installed to ensure proper water drainage. The slope is also known as pitch and is measured in inches of vertical drop over a horizontal distance of 12 inches.

The correct gutter slope is essential for directing water towards the downspouts and preventing water damage to your home’s foundation, walls, and landscaping.

To determine the correct gutter slope, you will need a level, chalk line, tape measure, and calculator.

The gutter should be installed level along the roofline, but it should slope downward towards the downspout to ensure proper water flow. The minimum slope recommended by professionals is 1/4 inch per 10 feet of gutter.

Calculating the Correct Gutter Slope

To calculate the correct gutter slope, you will need to measure the length of the gutter along the roofline, from the high point to where it meets the downspout.

For every 10 feet of gutter, you should allow a 1/4 inch drop. Multiply the length of the gutter (in feet) by 1/4 inch to find the total slope needed. Use a chalk line to mark the slope on the gutter and ensure that it is straight.

Alternatively, you can use the 1/4 inch rule to determine the correct gutter slope. According to this rule, the gutter should slope down 3/4 inch from one end to the other (1/4 inch x 3 = 3/4 inch). If the gutter starts at 0 inches, it should end at 3/4 inch lower to ensure proper slope.

Importance of Proper Slope for Water Drainage

Proper gutter slope is essential for effective water drainage and preventing water damage to your home. Without the correct slope, water can accumulate in the gutters, overflow, and cause damage to your home’s foundation, walls, and landscaping.

Additionally, stagnant water in the gutters can attract pests and promote the growth of mold and mildew.

Gutter Installation and Maintenance

Step-by-Step Guide to Gutter Installation

Installing gutters can be a DIY project, but it’s important to have some knowledge about the process before starting.

First, determine the length of gutter needed by measuring the roofline. Next, choose high-quality materials and hangers that can support the weight of the gutter.

Proper installation techniques are crucial for efficient water flow and adequate drainage.

If you’re not comfortable with DIY, it’s best to seek professional help. Professional gutter installers (see Gutter Cleaning near me) have the experience and workmanship to ensure seamless gutter installation. They can also adjust gutter slope and downspout placement for optimal performance.

Common Mistakes and Troubleshooting

One of the most common mistakes homeowners make is installing gutters with an incorrect slope. This can lead to water pooling and damage to the gutter system. To avoid this, calculate the correct pitch angle and adjust the slope accordingly.

Another common issue is gutter repair. Regular maintenance can prevent the need for costly repairs. Check for leaks, clogs, and damage to the gutter hangers. If you notice any issues, address them promptly to avoid further damage.

Regular Maintenance for Longevity

Home maintenance is crucial for the longevity of your gutter system.

Regularly clean out debris and leaves to prevent clogs. Adjust gutter slope if necessary to ensure proper water flow.

Check for damage to the gutter hangers and repair as needed.

In summary, proper gutter installation and maintenance are essential for efficient water flow and adequate drainage.

Whether you choose to DIY or seek professional help, use high-quality materials and installation techniques.

Regular maintenance can prevent common issues and prolong the life of your gutter system.

How Much Does a Private Investigator Cost to Catch a Cheater? A Comprehensive Guide to Investigative Fees

If you suspect that your partner is cheating, it can be a difficult and emotional time. You may feel a range of emotions, including anger, sadness, and confusion.

While it’s important to trust your instincts and address the issue, it can be challenging to gather evidence and prove your suspicions.

a client reaching out to an investigator

This is where a private investigator can help. Private investigators like in Ali Private Investigator Tampa, specialize in uncovering evidence of infidelity and can provide you with the proof you need to confront your partner.

However, you may be wondering how much a private investigator costs to catch a cheater and whether it’s worth it to hire one.

Understanding Private Investigator Costs

When it comes to hiring a private investigator to catch a cheater, it is important to understand the costs involved.

Private investigator costs can vary depending on a number of factors, including the type of investigation, the experience level of the investigator, and the location of the investigation.

In this section, we will explore the factors that can influence private investigator costs and the types of costs you can expect to encounter.

Factors Influencing Cost

There are several factors that can influence the cost of hiring a private investigator. Some of the most common factors include:

  • Type of investigation: The type of investigation you need can have a big impact on the cost. For example, a simple background check may cost less than a complex surveillance operation.
  • Hourly rates: Many private investigators charge by the hour, and their rates can vary depending on their experience level and the complexity of the investigation.
  • Retainer: Some private investigators require a retainer fee before they begin work on your case. This fee is typically based on the estimated number of hours required to complete the investigation.
  • Travel expenses: If your investigation requires the private investigator to travel, you may be responsible for covering their travel expenses.
  • Number of investigators: The more investigators that are required for your case, the higher the cost will be.
  • Surveillance equipment: If specialized equipment is required for your investigation, such as cameras or listening devices, this can add to the overall cost.

Types of Costs

When it comes to private investigator costs, there are two main types of costs to consider: hourly rates and flat rates.

  • Hourly rates: Many private investigators charge by the hour, and their rates can vary depending on their experience level and the complexity of the investigation. Hourly rates can range from $50 to $200 per hour, with the national average being around $105 per hour.
  • Flat rates: Some private investigators may offer flat rates for certain types of investigations, such as background checks or simple surveillance operations. Flat rates can range from a few hundred dollars to several thousand dollars, depending on the type of investigation and the level of complexity.

The Investigation Process

Initial Steps and Surveillance

When you suspect that your partner may be cheating on you, the first step is to hire a private investigator like Ali Private Investigator Tampa.

The cost of hiring a private investigator can vary depending on various factors such as the complexity of the case, location, and the amount of time required.

Once you have hired a private investigator, the investigation process begins with an initial consultation.

During the consultation, you will provide the investigator with all the information you have about your partner’s behavior, appearance, and whereabouts.

The investigator will then conduct surveillance to gather information about your partner’s activities.

The surveillance process may involve physical surveillance, where the investigator follows your partner to gather evidence of infidelity.

It may also involve the use of hidden cameras or other technology to monitor your partner’s activities.

Gathering and Analyzing Evidence

The next step in the investigation process is to gather and analyze evidence.

This may involve monitoring your partner’s social media accounts, browser history, and journal entries.

The investigator may also interview friends, family, and coworkers to gather additional information.

Once the investigator has gathered enough evidence, they will analyze it to determine whether your partner is cheating.

The evidence may include photographs, videos, and audio recordings.

Reporting and Legal Considerations

After the investigation is complete, the private investigator will provide you with a report of their findings. The report will include all the evidence gathered during the investigation, as well as any legal considerations that may arise.

If the evidence gathered during the investigation is admissible in court, you may choose to pursue legal action against your partner. However, legal battles can be costly and time-consuming.

https://en.wikipedia.org/wiki/ConfidentialityConfidentiality is also a key consideration during the investigation process. A reputable private investigator will ensure that all information gathered during the investigation is kept confidential. They will only share it with you or your legal counsel.

Who Can Investigate a Company: Understanding the Different Authorities and Regulations

“When it comes to investigating a company, several entities may be involved. Different parties may be responsible for conducting the investigation, depending on its nature. Understanding who can investigate a company is important for both employers and employees.” said Charles Jimerson of Private Investigator West Palm.

an inverstigator having a serious interview in a company

One of the primary entities responsible for investigating a company is the government. Specifically, the Federal Trade Commission’s Bureau of Consumer Protection is tasked with stopping unfair, deceptive, and fraudulent business practices. The bureau collects reports from consumers, conducts investigations, sues companies and individuals that break the law, develops rules to maintain a fair marketplace, and educates consumers and businesses about their rights and responsibilities. In addition, the Securities and Exchange Commission (SEC) investigates companies suspected of violating securities laws.

Another important entity that may investigate a company is the company itself. Many companies have internal policies and procedures for investigating potential wrongdoing by employees or management. These policies may include conducting workplace investigations, which are thorough investigations of a business in order to uncover any wrongdoing committed by employees, management, or third parties. Companies may also hire outside investigators to assist with these investigations.

Finally, employment law attorneys may be involved in investigating a company. These attorneys specialize in employment law and can advise both employers and employees on their legal rights and responsibilities. They may investigate potential violations of employment laws, such as discrimination or harassment, and can represent clients in legal proceedings.

Investigation Fundamentals

Types of Investigations

There are various types of investigations that a company may need to conduct, such as workplace investigations, due diligence investigations, and corporate investigations.

Workplace investigations are conducted to address employee misconduct, harassment, discrimination, theft, fraud, and other issues.

Due diligence investigations are conducted to evaluate potential business partners, investments, or acquisitions.

Corporate investigations are conducted to detect and prevent fraud, ensure compliance with laws and regulations, and safeguard the company’s reputation.

Key Players in Investigations

The key players in an investigation may vary depending on the type of investigation being conducted.

In a workplace investigation, the investigator may be an HR professional, an in-house counsel, or an outside investigator.

In a due diligence investigation, the investigator may be a third-party firm or an attorney.

In a corporate investigation, the investigator may be an internal audit team or an outside investigator. Other key players in an investigation may include management, employees, witnesses, and experts.

Legal Framework and Compliance

Investigations must be conducted in compliance with legal and regulatory requirements, such as employment law, privacy issues, and equal employment opportunity commission regulations.

Failure to comply with these requirements can result in legal risk and liability for the company. It is important to work with attorneys and other experts to ensure that investigations are conducted in compliance with the legal framework.

Conducting Effective Investigations

When conducting an investigation, it is important to follow a well-planned process to ensure that it is thorough, objective, and unbiased. With Private Investigator West Palm, we will provide an overview of the investigation process, including planning, evidence collection, and resolution.

Investigation Process and Planning

Before starting an investigation, it is important to have a clear investigation plan.

This includes identifying the allegation, misconduct, or wrongdoing that is being investigated, determining who will be involved in the investigation, and outlining the steps that will be taken to complete the investigation.

It is also important to take immediate action if necessary, such as suspending an employee or securing physical evidence. In addition, confidentiality should be maintained throughout the investigation to protect the privacy of those involved.

Interviews and Evidence Collection

Interviews are a critical part of any workplace investigation.

When conducting interviews, open-ended questions should be used to encourage witnesses to provide detailed accounts of what they observed.

It is important to document all interviews and maintain confidentiality.

Physical evidence, such as emails or surveillance footage, can also be collected to support the investigation.

Technology, such as e-discovery tools, can be used to assist in collecting and analyzing evidence.

Resolving Investigations

After all evidence has been collected and interviews have been conducted, a final decision must be made regarding the investigation.

This includes determining whether wrongdoing occurred and what disciplinary action, if any, should be taken. The decision should be based on the credibility of the witnesses and the physical evidence collected during the investigation.

Once a decision has been made, follow-up actions should be taken to ensure that the issue has been resolved.

This may include disciplinary action, termination, or additional training for employees. An investigative report should also be prepared to document the investigation and its findings.

Conducting an effective workplace investigation requires careful planning, thorough evidence collection, and objective decision-making. By following these steps, you can ensure that your investigation is conducted in a fair and unbiased manner.

Does TPO Roofing Require Underlayment? The Answer You Need to Know

If you’re considering TPO roofing for your building, you may be asking whether or not it requires underlayment. The answer to this question is not a simple yes or no. It depends on a few different factors.

a house with good TPO roofing

First, it’s important to understand what TPO roofing is. TPO stands for thermoplastic olefin, which is a type of single-ply roofing material. TPO roofing is commonly used on commercial and industrial buildings. It is known for its energy efficiency, durability, and ease of installation. It is typically installed in large sheets that are welded together to create a seamless, watertight barrier.

When it comes to underlayment, TPO roofing does not necessarily require it. However, there are some situations where underlayment may be recommended or required.” said Charles Jimerson of Commercial Roofing NJ.

For example, if the roof deck is uneven or in poor condition, an underlayment may be necessary to create a smooth surface for the TPO membrane to be installed on. Additionally, some building codes or roofing manufacturers may require the use of a specific type of underlayment with TPO roofing.

Understanding TPO Roofing

If you are considering TPO roofing for your commercial or residential property, it is important to understand the composition and installation process of this type of roofing. TPO, or Thermoplastic Polyolefin, is a single-ply roofing membrane that is known for its energy efficiency, durability, and lightweight properties. In this section, we will explore the characteristics of TPO roofing, the installation process, and the advantages of using TPO roofing.

Composition and Characteristics

TPO roofing is made up of a blend of synthetic materials, including ethylene propylene diene monomer (EPDM), polyvinyl chloride (PVC), and chlorinated polyethylene (CPE). The TPO membrane is typically white, which helps to reduce heat absorption and reflect sunlight, making it a popular choice for cool roofs. TPO roofing is also environmentally friendly and recyclable.

Installation Process

Before installing TPO roofing, you need to make sure that the roof deck is clean, dry, and free of debris. Then, you can roll out the TPO membrane carefully. Make sure to pay attention to proper alignment and overlap areas for welding. The seams are heat welded together, creating a strong and durable bond. Fasteners are used to secure the TPO membrane to the roof deck, and flashing is installed around the edges and any penetrations.

Advantages of TPO Roofing

TPO roofing offers many advantages over other types of roofing materials. It is cost-effective, energy-efficient, and durable, making it a popular choice for commercial and residential properties. TPO roofing is also flexible and can withstand extreme temperatures, making it ideal for use in areas with harsh weather conditions. Additionally, TPO roofing is resistant to UV radiation and can reflect solar heat, which can help to reduce energy costs.

TPO Roofing System Details

Underlayment Necessity and Alternatives

TPO roofing systems are known for their durability, energy efficiency, and ease of installation. One common question that arises is whether TPO roofing requires underlayment. The answer is that it depends on the specific roofing project and the building’s needs.

While TPO roofing systems do not require underlayment, a slip sheet or separation layer may be used on top of the roof to protect the membrane from abrasion due to rooftop equipment or exposure to chemicals. Additionally, some building codes may require underlayment for specific roofing projects.

If underlayment is necessary for your TPO roofing system, there are a few alternatives to consider.

One option is to use a vapor barrier as an alternative to traditional underlayment. Another option is to use insulation as an underlayment alternative, such as polyiso insulation. Your professional roofer can help you determine the best underlayment option for your specific roofing project.

Maintenance and Repair Considerations

Like any roofing system, TPO roofing systems require regular maintenance and occasional repairs. It is important to have your TPO roofing system inspected regularly by a professional roofer like Commercial Roofing NJ to identify any potential issues before they become major problems.

Common maintenance tasks for TPO roofing systems include cleaning the roof surface, removing debris, and inspecting seams and flashings. If you notice any leaks or punctures in your TPO roofing system, make sure to have them repaired as soon as possible to prevent further damage.

Cost Analysis and Warranty Information

When considering a TPO roofing system, it is important to consider the cost and warranty information.

The cost of a TPO roofing system can vary depending on factors such as the size of the roof, the labor costs, and the roofing materials used.

However, TPO roofing systems are generally considered cost-effective due to their energy efficiency and longevity.

TPO roofing systems can last anywhere from 15 to 40 years, depending on a number of variables.

Additionally, many TPO roofing systems come with warranties that can cover defects in materials or workmanship.

Be sure to read and understand the warranty information before installing a TPO roofing system to ensure that you are covered in the event of any issues.

Overall, TPO roofing systems are a popular choice for commercial buildings due to their durability, energy efficiency, and ease of installation.

With proper maintenance and repair, a TPO roofing system can provide reliable protection for many years to come.

How Much to Fix a Leaking Toilet? A Guide to Repair Costs

If you have a leaking toilet, you may be wondering how much it will cost to fix it. A leaking toilet not only wastes water but can also increase your water bills.

The cost to fix a leaking toilet depends on the cause of the leak and the extent of the damage. Let us know it with Dean Owens of Plumber Warragul.

a drain fixation

To diagnose a leaking toilet, you can check for visible signs of water around the base of the toilet or on the floor. You can also put food coloring in the toilet tank and wait to see if the water in the bowl changes color. If it does, you likely have a leak. However, it’s recommended to call a plumber to diagnose and fix the problem to avoid causing further damage.

It’s important to fix a leaking toilet as soon as possible to avoid wasting water and increasing your water bills. The cost to fix a leaking toilet can vary depending on the cause of the leak and the extent of the damage.

In some cases, it may be a simple fix such as replacing a faulty valve. In other cases, it may require more extensive repairs or even a toilet replacement.

Identifying the Source of the Leak

If you have a leaking toilet, the first step is to identify the source of the problem. This will help you determine the cost of fixing the leak and the necessary repairs.

In this section, we will discuss how to identify the source of the leak by inspecting the toilet components and testing the toilet for leaks.

Inspecting the Toilet Components

To inspect the toilet components, start by removing the tank lid and checking for any visible signs of leaks. Look for water around the base of the tank, on the floor, or on the toilet bowl. If you notice any water, dry it up with a towel and inspect the components of the toilet.

Check the flapper valve, which is responsible for controlling the water flow from the tank to the bowl. If it is worn, cracked, or damaged, it may be the source of the leak.

Also, check the fill valve, which controls the water level in the tank. If it is damaged or not functioning correctly, it may cause water to leak from the tank.

Inspect the flush valve, which is responsible for releasing water from the tank into the bowl during flushing. If it is damaged or worn, it may cause water to leak from the tank.

Finally, check the wax ring and the flange, which are located at the base of the toilet. If they are damaged or worn, they may cause water to leak from the base of the toilet.

Testing the Toilet for Leaks

To test the toilet for leaks, start by adding a few drops of food coloring to the tank. Wait for a few minutes and then check the toilet bowl. If you notice any colored water in the bowl, it means that there is a leak between the tank and the bowl. This could be due to a faulty flapper valve or an issue with the flush valve.

If you notice water around the base of the toilet, it means that there is a leak between the toilet and the floor. This could be due to a damaged wax ring or flange.

To confirm the source of the leak, you can perform a water test. Fill a bucket with water and pour it around the base of the toilet. If you notice any water seeping out, it means that there is a leak between the toilet and the floor.

Repair and Replacement Solutions

DIY Repair Tips

If you’re looking to fix a leaking toilet, there are a few DIY repair tips you can try before calling in a professional plumber.

One of the most common causes of a leaking toilet is a faulty flapper. To fix this, you’ll need to turn off the water supply valve and drain the toilet tank. Then, remove the old flapper and replace it with a new one. This is a simple fix that can be done with basic tools.

Another common cause of a leaking toilet is a worn-out wax ring seal. To replace this, you’ll need to turn off the water supply valve and drain the toilet. Then, remove the toilet from the floor and replace the wax ring seal. This is a more advanced repair that may require more tools and expertise.

When to Call a Professional Plumber

DIY repairs can save you money, but there are times when it’s best to call in a professional plumber. If you’re not comfortable working with nuts and bolts, or if you’re not sure what’s causing the leak, it’s best to call in a professional like Plumber Warragul.

A plumber can quickly diagnose the problem and recommend the best course of action. If you need replacement parts, a professional plumber can also help you find the right parts for your toilet.

They can also ensure that the parts are installed correctly, which can prevent future leaks and damage to your toilet.

In some cases, a leaking toilet may be a sign of a larger problem, such as a problem with the toilet cistern or toilet flange. A professional plumber can help you identify and fix these issues before they cause more damage to your home.

How to Unblock a Badly Blocked Drain: Tips and Tricks

Have you ever experienced a badly blocked drain? It can be a frustrating and unpleasant situation to deal with. A blocked drain can cause water to back up and overflow, resulting in potential damage to your property.

Fortunately, there are several ways to unblock a drain and prevent further damage. Let us know it with Dean Owens of Plumber Warragul.

a severely blocked drainage

One of the most common methods to unblock a drain is by using a plunger. This tool creates pressure that can dislodge the blockage and allow water to flow freely.

However, if the blockage is severe, a plunger may not be enough. In this case, you may need to try other methods such as using a drain snake or chemical drain cleaners.

It is important to note that chemical drain cleaners can be harmful to the environment and should be used with caution.

Identifying the Blockage

If you’re experiencing a badly blocked drain, it’s important to identify the cause of the blockage before attempting to unblock it. This will help you determine the best method to use and avoid causing further damage to the pipes.

Signs of a Blocked Drain

There are several warning signs that indicate a blocked drain. These include:

  • Water draining slowly or not at all
  • Gurgling sounds coming from the drain
  • Foul smell coming from the drain or surrounding area
  • Water overflowing from the drain

If you notice any of these signs, it’s likely that you have a blocked drain that needs to be cleared.

Common Causes of Blockages

There are many different things that can cause a drain to become blocked. Some of the most common causes include:

  • Hair and soap buildup in bathroom drains
  • Food waste and grease buildup in kitchen drains
  • Tree roots growing into outdoor pipes
  • Foreign objects such as toys or sanitary products being flushed down the toilet

It’s important to identify the cause of the blockage in order to prevent it from happening again in the future.

For example, if the blockage is caused by hair and soap buildup in a bathroom drain, you can prevent it from happening again by using a drain cover to catch hair and regularly cleaning the drain with a mixture of baking soda and vinegar.

Clearing the Blockage

If you have a badly blocked drain, there are several methods you can use to clear the blockage. In this section, we will explore some manual methods, chemical treatments, and professional solutions that can help you get your drain flowing again.

Manual Methods

One of the easiest ways to clear a blocked drain is to use a plunger. This tool creates suction that can help dislodge the blockage and allow water to flow freely again.

To use a plunger, place it over the drain and push down gently to create a seal. Then, pump the plunger up and down several times, being careful not to break the seal. Repeat this process several times until the blockage is cleared.

Another manual method you can try is using a drain snake. This tool is a long, flexible wire that can be inserted into the drain to dislodge the blockage.

To use a drain snake, insert it into the drain and twist it gently as you push it further in. When you encounter the blockage, twist the snake around and pull it back out, bringing the blockage with it.

Chemical Treatments

If manual methods don’t work, you can try using a chemical treatment to clear the blockage.

One popular option is to pour a mixture of baking soda and vinegar down the drain. This will create a chemical reaction that can break up the blockage and allow water to flow freely again.

Alternatively, you can use a commercial drain cleaner, but be sure to follow the instructions carefully and use protective gloves and eyewear.

Professional Solutions

If manual and chemical methods don’t work, it may be time to call in a professional plumber like Plumber Warragul.

A plumber can use CCTV cameras to inspect the inside of your pipes and locate the blockage. They can also use tools like a drain snake or coat hanger to physically remove the blockage. In more severe cases, they may recommend pipe relining or replacement.

In summary, there are several methods you can use to clear a badly blocked drain. These include manual methods like plungers and drain snakes, and chemical treatments like baking soda and vinegar. Professional solutions like CCTV inspections and pipe relining are also available. If you’re not comfortable tackling the problem yourself, don’t hesitate to call in a professional plumber to get the job done.

Can You Paint Gutters in Australia? A Guide to Painting Your Gutters in Australia

Painting your gutters can be a great way to refresh the look of your home’s exterior. But can you paint gutters in Australia? The answer is yes, you can. In fact, painting gutters is a common practice in Australia. And it can be done easily with the right tools and techniques. Let us have it with Gutter Cleaning near me.

man painting a roof gutter of a home in Australia

Before you begin, it’s important to clean your gutters thoroughly. This will ensure that the paint adheres properly and lasts longer.

You can use a pressure washer or a hose to clean your gutters. Make sure to remove any debris or dirt that may be stuck to the surface.

Once your gutters are clean, you can apply a primer to prepare the surface for painting. A single coat of primer is often enough, but you may need to apply more if your gutters are particularly worn or damaged.

Once the primer has dried, you can apply your chosen paint.

It’s important to use a paint that is suitable for outdoor use and that is designed for the material of your gutters.

Vinyl gutters, for example, require a different type of paint than aluminum or steel gutters.

You can use a brush or a sprayer to apply the paint. Be sure to apply at least two coats for a smooth, even finish.

Preparing Your Gutters for Painting

Before painting your gutters, it is important to prepare them properly to ensure that the paint adheres well and lasts longer. This section outlines the steps you should take to prepare your gutters for painting.

Cleaning and Sanding

The first step in preparing your gutters for painting is to clean them thoroughly.

You can use a detergent, soap and water, or sugar soap to remove any dirt, grime, or old paint.

If your gutters have a lot of dirt and debris, you can use a power washer to clean them. However, be careful not to damage the gutters or the surrounding area.

After cleaning, you should sand the gutters to create a rough surface that will help the paint adhere better.

Use a fine-grit sandpaper to sand the gutters lightly. Be careful not to sand too hard and remove too much material.

Choosing the Right Primer and Paint

Choosing the right primer and paint is crucial for a successful gutter painting project. The type of material your gutters are made of will determine the type of primer and paint you should use.

For aluminium gutters, you can use a clear acrylic bonding primer or a regular oil-based primer, as long as it is ammonia-free.

If your gutters are steel, you should use a primer that is specifically designed for steel. For vinyl gutters, prepare the surface with denatured alcohol before applying the primer.

When it comes to choosing the paint, you should use an exterior latex paint or an acrylic paint that is specifically designed for metal surfaces.

These types of paint are durable and can withstand harsh weather conditions.

Before applying the primer and paint, make sure the gutters are completely dry. If there is any rust on the gutters, treat it with a rust converter before applying the primer.

Applying Paint to Gutters

Painting Techniques and Tips

When painting your gutters, there are a few techniques and tips you should keep in mind to ensure a successful outcome.

First, you should choose the right paintbrush or roller for the job. A high-quality paintbrush or roller will help you achieve a smooth and even finish.

If you want to achieve a professional-looking result, you may want to consider using a paint sprayer. However, keep in mind that using a paint sprayer requires some skill and experience.

Before applying the paint, it’s important to prepare the surface properly. This includes cleaning the gutters thoroughly and ensuring they are free from any dirt, debris, or peeling paint.

If you are repainting your gutters, you should also consider applying a primer or sealant to help the paint adhere better and ensure a longer-lasting finish.

When choosing a colour for your gutters, make sure to consider the appearance and curb appeal of your home.

Lighter colours can help to reflect heat and keep your home cooler, while darker colours can help to hide dirt and grime.

You should also consider the sheen of the paint, as a glossier finish can help to make your gutters stand out and look more attractive.

Ensuring Longevity and Aesthetic Appeal

To ensure the longevity and aesthetic appeal of your newly painted gutters, it’s important to take care of them properly.

This includes avoiding harsh chemicals or abrasive cleaning methods that can damage the paint.

You should also keep an eye out for any signs of wear or fading and schedule regular repainting as needed.

If you don’t have the skill or experience to paint your gutters yourself, you may want to consider hiring a professional painter like Gutter Cleaning near me.

A professional painter can help you achieve a high-quality finish and ensure your gutters look their best for years to come.

Can You Just Replace a Few Shingles on a Roof? Expert Advice on Partial Roof Replacement

If you’ve noticed a few damaged shingles on your roof, you may be wondering if you can simply replace them instead of replacing the entire roof. The answer is: it depends. In some cases, replacing a few shingles is a viable option, while in others, it may be more cost-effective to replace the entire roof.

man replacing shingled roof

If the damage is limited to just a few shingles, and the rest of the roof is in good condition, it may be possible to replace just those shingles. This is especially true if the shingles are relatively new and still readily available. However, if the damage is more widespread, or if the roof is nearing the end of its lifespan, it may be more practical to replace the entire roof rather than trying to repair it piece by piece.

When considering whether to replace a few shingles or the entire roof, it’s important to take into account the age of the roof, the extent of the damage, and the cost of the repairs. A professional roofing contractor like Roofing West Palm Beach, can assess the damage and provide you with an estimate for both options, allowing you to make an informed decision about the best course of action for your home and budget.

Assessing Roof Damage

When assessing roof damage, be thorough and take the time to inspect your roof properly. This can help you determine whether you need to replace a few shingles or your entire roofing system. Here are some tips to help you evaluate the extent of the damage:

Identifying Shingle Damage

The first step in assessing your roof is to identify any shingle damage. This can include missing shingles, damaged shingles, or shingles that are discolored or warped. You can use binoculars to inspect your roof from the ground, or climb up to your roof if it’s safe to do so.

Evaluating the Extent of Damage

Once you’ve identified any shingle damage, you’ll need to evaluate the extent of the damage. If you only have a few missing or damaged shingles, it may be possible to replace them without replacing the entire roof. However, if the damage is more extensive, you may need to replace the entire roofing system.

Storm damage, water damage, and mold can all contribute to roof damage. If you’ve experienced a storm or heavy rain, inspect your roof for any signs of damage. Look for missing shingles, damaged shingles, or any signs of leaks or water damage in your attic.

If you have an older roof, it’s also important to inspect it regularly for signs of wear and tear. Older roofs are more susceptible to damage and may need to be replaced sooner than newer roofs.

If it is hard for you to do the extent of the damage, you can have Roofing West Palm Beach do it for you.

Executing Shingle Replacement

When replacing damaged shingles on your roof, make sure you have the right tools and materials on hand. Here are the steps you need to follow to execute shingle replacement effectively:

Gathering Necessary Tools and Materials

Before you start replacing shingles, gather the necessary tools and materials. You will need a ladder, safety gear such as gloves and a harness, a hammer, roofing nails, a flat pry bar, a utility knife, replacement shingles, roofing cement, and a caulking gun with adhesive.

Removing Damaged Shingles

To remove damaged shingles, use the flat pry bar to lift the shingle above the damaged one. Then, use the hammer and pry bar to remove the nails holding the damaged shingle in place. Once the nails are removed, slide the shingle out from under the shingle above it.

Installing New Shingles

To install new shingles, slide the replacement shingle into place and secure it with roofing nails. Apply roofing cement to the back of the shingle to ensure a watertight seal. Repeat this process for each damaged shingle.

Ensuring Quality and Prevention

To ensure the quality and prevention of future damage, check the integrity of the existing roof and underlayment. If you notice any issues, such as curling or wind uplift, it may be necessary to replace the entire roof.

Additionally, make sure to properly seal and secure the replacement shingles with roofing cement and nails. This will prevent leaks and damage caused by storms or winds.

While shingle replacement can be a DIY project, it’s often best to hire a professional roofing contractor. They have the necessary experience and tools to ensure the job is done correctly and safely.

Plus, many contractors offer warranties and insurance policies to protect your home repair investment.

By following these steps and taking the necessary precautions, you can effectively replace damaged shingles on your roof and maintain its aesthetic appeal and value.