Is it Okay to Walk on a Flat Roof? Exploring the Risks and Safety Measures

Walking on a flat roof is a common practice for homeowners and contractors alike. Whether it’s for maintenance, repair, or simply to enjoy the view, walking on a flat roof can be a necessary task.

However, the question remains: is it okay to walk on a flat roof? Let us know it with David Spade of Roofing West Palm Beach.

a durable flat roofing

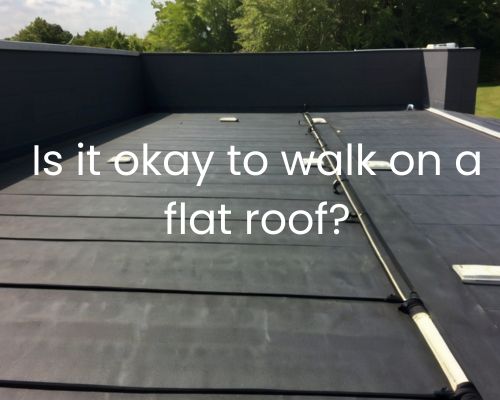
The answer is not a simple yes or no. It depends on several factors, such as the type of roofing material, the age of the roof, and the weight capacity of the roof.

For example, a flat roof made of asphalt or rubber is generally safe to walk on, while a metal or fiberglass roof may not be able to support the weight of a person.

In addition to the type of roofing material, the age of the roof is also an important factor to consider. An older roof may be more prone to damage and may not be able to support the weight of a person as well as a newer roof.

It’s important to inspect the roof for any signs of damage or deterioration before walking on it. If you’re unsure about the condition of your roof, it’s best to consult with a professional roofing contractor.

Assessing Roof Safety and Preparation

Before walking on a flat roof, it is important to assess the safety of the roof and prepare accordingly.

This section will cover the key factors that you should consider before walking on a flat roof. These include the understanding of flat roof structure and materials, pre-walk inspection and identifying hazards, and safety precautions and equipment.

Understanding Flat Roof Structure and Materials

Flat roofs are common in residential and commercial buildings, and they are typically constructed with a slight slope or pitch to allow for proper drainage.

Flat roofs can be made from a variety of materials, including built-up roofing, EPDM, TPO, rubber, and other flat roofing materials.

It is important to understand the structure and materials of your flat roof to assess its safety. Flat roofs can be dangerous to walk on if they are not in good condition or have not been properly maintained.

Cracks, holes, and punctures in the roof can be hazardous and may cause you to fall through the roof.

Pre-Walk Inspection and Identifying Hazards

Before walking on a flat roof, it is important to conduct a pre-walk inspection to identify any potential hazards.

Look for debris, such as branches or leaves, that may be on the roof and could cause you to slip or lose your footing.

Check for any holes or punctures in the roof that could be dangerous.

Inspect the condition of the roof, including any cracks or other signs of wear and tear.

If you notice any dangerous conditions, such as a hole or other damage, do not attempt to walk on the roof. Instead, contact a professional roofing contractor to assess and repair the roof.

Safety Precautions and Equipment

When walking on a flat roof, it is important to take safety precautions and use the appropriate equipment.

Wear shoes with good traction to prevent slipping, and consider wearing a safety harness to prevent falling.

Use a stable ladder to access the roof, and make sure the ladder is secure and in good condition.

If you are not comfortable walking on the roof or do not have the appropriate equipment, it is best to hire a professional roofing contractor to perform the work.

Professional roofing contractors have the experience and equipment necessary to safely walk on a flat roof and identify any potential hazards.

Walking on a Flat Roof

Walking on a flat roof can be necessary for various reasons, including maintenance and repair work. However, it is important to take necessary precautions to avoid any accidents.

In this section, we will discuss the best practices for foot traffic on a flat roof and the maintenance and repair considerations.

Best Practices for Foot Traffic

When walking on your roof, it is important to wear stable and slip-resistant shoes. Avoid wearing high heels, sandals, or shoes with smooth soles.

Instead, wear shoes with rubber soles that provide good traction.

Before walking on your roof, inspect it for any damage or weak spots.

Check for any loose roofing felt, glass, plastic, or fiberglass. Also, make sure that the gutter, vents, skylights, and drains are clear of any debris.

When scaling a ladder, ensure that you place it on a secure base with a slope of 4-to-1.

Additionally, allow the top of the ladder to extend three feet above the top of the roof. This setup reduces the risk of slipping and falling when ingressing and egressing.

While walking on the roof, distribute your weight evenly and avoid stepping on the edges or corners of the roof.

If possible, walk on the joists or support beams rather than the roofing material itself.

Maintenance and Repair Considerations

Walking on a flat roof can cause damage if not done correctly. Therefore, it is important to take necessary precautions to avoid any damage to the roofing system.

When walking on your roof, avoid dragging heavy objects or tools that can puncture or damage the roofing material. Also, avoid walking on the roof during extreme weather conditions such as heavy rain, ice, or snow.

If you notice any damage to the roofing material while walking on your roof, repair it as soon as possible. Delaying the repair can cause further damage and increase the repair costs. If you cannot do the repair work, you can have Roofing West Palm Beach do it for you.

What is a Private Investigator? A Simple Definition and Explanation

If you’re curious about what a private investigator is, you’re not alone. Private investigators, also known as PIs, are professionals who are hired to gather information and investigate cases for individuals, organizations, and businesses.

In simple terms, private investigators like Ali Private Investigator Tampa are like detectives who work outside of law enforcement agencies.

a private investigator

Private investigators can be hired for a variety of reasons, including to investigate infidelity, locate missing persons, conduct background checks, and gather evidence for civil or criminal cases.

They use a combination of surveillance, research, and interviewing skills to collect information and solve cases. Private investigators may work independently or as part of a larger investigative agency.

To become a private investigator, you typically need to have a background in law enforcement or a related field, although some states and countries have different requirements.

Private investigators must also have a license to practice in most jurisdictions. If you’re interested in pursuing a career as a private investigator, it’s important to research the requirements in your area and gain relevant experience and education.

Understanding the Role of a Private Investigator

Private investigators are professionals who are hired to gather information, uncover evidence, and provide detailed reports on a wide range of matters. Their role revolves around conducting investigations on behalf of individuals, businesses, or organizations.

In this section, we will explore the different services and expertise provided by private investigators, the types of investigations they conduct, and the legal and ethical considerations they must adhere to.

Services and Expertise

Private investigators like Ali Private Investigator Tampa offer a wide range of services and expertise to their clients. They can gather information, conduct research, perform surveillance, conduct background checks, and conduct interviews.

They are skilled at analyzing and interpreting information, and they can provide detailed reports that are easy to understand.

Types of Investigations

Private investigators conduct various types of investigations, including criminal investigations, insurance investigations, civil investigations, and internal investigations.

They use a variety of investigative techniques, including skip tracing, undercover work, and computer forensics. They also investigate cases involving fraud, missing persons, theft, and identity theft.

Legal and Ethical Considerations

Private investigators must adhere to strict legal and ethical considerations. They must obtain a private investigation license and maintain a clean criminal record.

They must also adhere to jurisdictional laws and regulations and ensure that their investigations do not violate the privacy rights of individuals.

They must also ensure that their investigative techniques do not cause undue harm to the subjects under investigation.

Working in Private Investigation

If you are interested in working as a private investigator, there are certain qualifications and skills you will need to possess. Additionally, there are various employment opportunities and specializations within the profession that you can pursue.

In this section, we will explore the qualifications and skills needed to become a private investigator, as well as the different types of employment and specializations available in the field. We will also provide some historical and contemporary context for private investigation as a profession.

Qualifications and Skills

To work as a private investigator, you will need to have a high school diploma or GED. However, many employers prefer candidates who have a degree in a related field, such as criminology or criminal justice.

In addition to formal education, you will need to have certain skills and qualities to be successful in this profession. These include:

  • Attention to detail: Private investigators must be meticulous in their work, paying close attention to even the smallest details.
  • Communication skills: Investigators need to be able to communicate effectively with clients, witnesses, and other professionals.
  • Analytical skills: Private investigators must be able to analyze information and draw conclusions based on that information.
  • Discretion: Investigators often deal with sensitive information and must be able to maintain confidentiality.
  • Physical fitness: Some investigations require surveillance or other physical activities, so investigators must be in good physical condition.

Employment and Specializations

Private investigators can be hired by individuals, businesses, organizations, or law enforcement agencies. Some common areas of specialization within the profession include:

  • Corporate investigation: Investigators in this field work for businesses and organizations to investigate issues such as fraud, theft, and employee misconduct.
  • Private security: Some investigators work in private security, providing protection for individuals or businesses.
  • Domestic investigation: Investigators in this field work on cases such as infidelity, child custody, and missing persons.
  • Legal investigation: Investigators in this field work with lawyers and law firms to gather evidence for legal cases.

How Many Layers Does a Commercial Roof Have? A Comprehensive Guide

Based on commercial roofing contractors nj “When it comes to commercial roofing, there are several important factors to consider. One of these factors is the number of layers that make up the roof. Understanding the layers of a commercial roof is crucial for property owners and managers, as it can impact the durability and longevity of the roof.”

man checking out the roofings on the commercial building

So, how many layers does a commercial roof have? The answer can vary depending on the type of roofing system being used. For example, a typical built-up roof may have three to five layers, while single-ply roofing systems typically have only one layer. The number of layers can also depend on the specific materials being used, as well as the design and structure of the building.

Composition and Structure of Commercial Roofing

When it comes to commercial roofing, there are several layers that make up the overall structure. Each layer plays an important role in protecting your building from the elements, as well as providing insulation and durability.

In this section, we’ll take a closer look at the composition and structure of commercial roofing. We’ll cover the layered materials and their functions, insulation and decking, and surface and protective layers.

Layered Materials and Their Functions

The layered materials of a commercial roof generally include a substrate, insulation, and a protective layer.

The substrate is typically made of plywood or another type of decking material, and provides the foundation for the roof. Meanwhile, the insulation layer helps to regulate temperature and prevent heat loss. It can be made of various materials such as fiberglass or foam.

Finally, the protective layer is what provides the waterproofing and durability of the roof. It can be made of materials such as built-up roofing (BUR), modified bitumen, asphalt shingles, metal panels, or even concrete or clay tiles.

Insulation and Decking

The insulation layer of a commercial roof is crucial for maintaining a comfortable interior temperature and reducing energy costs.

Common insulation materials include fiberglass, foam, and polymers. These can be installed in various thicknesses depending on the desired R-value.

Meanwhile, the decking layer, or substrate, provides the base for the insulation and protective layers.

Typically made of plywood or other materials, the decking layer must be properly installed and sealed to prevent moisture from penetrating the roof system.

Surface and Protective Layers

The surface and protective layers of a commercial roof are what provide the waterproofing and durability of the system.

Built-up roofing (BUR) is a common type of surface layer, consisting of multiple layers of asphalt and felt or fabric. It is often topped with a layer of gravel for added protection.

Modified bitumen is another popular surface layer, consisting of a single-ply membrane that is reinforced with fiberglass or polyester.

Metal panels are a durable and long-lasting option for commercial roofing, and can be made of materials such as tin, copper, or aluminum.

Finally, asphalt shingles, concrete or clay tiles, and wood shakes are all popular choices for commercial roofing, depending on the desired aesthetic and durability.

Maintenance, Repair, and Replacement

Maintaining and repairing your commercial roof is essential to ensure its longevity and safety. Regular inspections and maintenance can help identify and address damage before it becomes a major problem.

With commercial roofing contractors nj, we’ll discuss how to extend the lifespan of your roof and enhance its performance through proper maintenance, repair, and replacement.

Identifying and Addressing Damage

Regular roof inspections are critical for identifying and addressing damage. Tears, punctures, and other signs of wear and tear should be addressed as soon as possible to prevent further damage.

If you notice any damage to your roof, make sure to get it repaired by a professional roofing contractor with experience in commercial roofing work.

Extending Lifespan and Enhancing Performance

There are several ways to extend the lifespan of your commercial roof and enhance its performance. Reinforcement can help make your roof more durable and better able to withstand wind, weight, and other risks.

Choosing the right roofing material for your building is also important. Organic roofing materials, such as tar and gravel, can be heavier and more vulnerable to damage than synthetic materials like TPO, EPDM, and PVC.

Proper installation and maintenance of solar panels can also help extend the lifespan of your roof. However, ensure that the installation of solar panels doesn’t damage your roof or create fumes that could be harmful to your building or its occupants.

When it comes to maintenance, regular inspections and cleaning can help prevent damage and extend the lifespan of your roof.

It’s also important to follow industry standards and manufacturer warranty requirements to ensure that your roof stays safe and functional.

If your roof does need to be replaced, it’s important to choose a reputable roofing contractor with experience in commercial roofing work. Look for a contractor with a strong warranty and a track record of quality workmanship to ensure that your new roof will last for years to come.

Will Roofing Costs Decrease in 2024? A Look at Industry Trends and Predictions

If you’re planning to replace or install a new roof in 2024, you may be wondering if roofing costs will go down. See it in commercial roofing companies nj.

house in need of roof replacement

The cost of roofing materials and construction pricing has been on the rise in recent years. This has caused concerns among homeowners and commercial building owners alike. However, predicting future roofing costs can be challenging due to various factors that can influence the market.

According to a recent study, the average cost of a roof replacement in the US ranges from $9,000 to $17,600 for a 2,000-2,200 sq. ft. roof on a single-family house up to two-stories high. The cost of a new roof depends on various factors, such as the type of roofing material, the size of the roof, the complexity of the installation, and the location of the property. While the cost of roofing materials has been on the rise, there are some factors that could potentially lead to a decrease in roofing costs in 2024.

One factor that could influence roofing costs in 2024 is the state of the economy. Economic downturns can lead to a decrease in demand for roofing services, which could lead to lower prices. Additionally, advancements in technology and changes in the roofing industry could lead to more efficient and cost-effective roofing solutions.

While it’s difficult to predict exactly how roofing costs will change in 2024, understanding the factors that influence the market can help you make informed decisions when it comes to your roofing needs.

Factors Influencing Roofing Costs in 2024

When it comes to roofing costs in 2024, there are several factors that will influence the prices you can expect to pay for roofing services. Here are some of the most significant factors that will impact roofing costs in 2024:

Material Costs and Availability

The cost and availability of roofing materials will continue to be a major factor that affects roofing costs in 2024.

The prices of roofing materials, such as asphalt shingles, metal roofing, and underlayment, can be affected by various factors, including the cost of oil, inflation, and natural disasters. For instance, hurricanes and hailstorms can cause a temporary increase in roofing material prices due to supply chain disruptions and increased demand.

Labor Market Dynamics

The cost of labor is another significant factor that will impact roofing costs in 2024.

The availability of skilled roofing contractors or commercial roofing companies nj, their level of experience, and the cost of labor will all play a role in determining the final cost of your roofing project. Moreover, the pandemic has caused some changes in the labor market, including the adoption of safety protocols, which may affect the cost of labor in the long run.

Economic and Environmental Factors

Economic and environmental factors can also influence roofing costs in 2024.

Inflation, for example, can cause the prices of roofing materials and labor to increase over time. Additionally, the shift towards sustainable and eco-friendly roofing solutions may impact the prices of roofing materials in the future.

Considerations for Homeowners

When it comes to roofing, homeowners have a lot to consider. Here are some important factors to keep in mind before deciding whether to repair or replace your roof.

Roof Replacement vs. Repair

Before making any decisions, it’s important to determine whether your roof needs a full replacement or just a repair.

If your roof is relatively new and only has minor damage, a repair may be all that’s needed. However, if your roof is older or has sustained significant damage, a full replacement may be necessary.

Additional Costs and Savings

In addition to the cost of a new roof or roof replacement, there are other expenses to consider.

For example, the size and pitch of your roof can affect the cost of the project. Additionally, the location of your home, design choices, and accessories like skylights and chimneys can all impact the final cost.

It’s also important to factor in the long-term savings of a new roof. A durable, high-quality roof can help reduce energy costs and prevent costly repairs down the line. Some manufacturers also offer warranties that can provide additional protection and peace of mind.

Regular Maintenance and Inspections

Regular maintenance and inspections can help extend the life of your roof and prevent costly repairs.

It’s important to have your roof inspected by a professional at least once a year, and to address any issues as soon as they arise. Regular cleaning and removal of debris can also help prevent damage and prolong the life of your roof.

Permits and Clean-Up Costs

Before beginning any roofing project, it’s important to obtain any necessary permits and to factor in clean-up costs.

A reputable roofing contractor should be able to provide a detailed breakdown of all costs associated with your project, including any necessary permits and clean-up fees.

Discounts and Workmanship Warranties

Finally, it’s important to choose a reputable roofing contractor who offers a workmanship warranty. This can provide additional protection and peace of mind in the event that any issues arise after the project is complete.

Additionally, some contractors may offer discounts or financing options to help make the project more affordable.

By considering these factors and working with a reputable roofing professional, you can make informed decisions for your roofing project and ensure that your home is protected for years to come.

How Long Will a Built-Up Roof Last? A Comprehensive Guide

When it comes to commercial roofing, built-up roofing (BUR) is a popular choice due to its durability and longevity. However, as a property owner or manager, you may be wondering: how long will a built-up roof last? Get to know it with the biggest roofing company in the us.

The answer depends on a variety of factors. With proper installation and maintenance, a BUR can last anywhere from 20 to 40 years.

metal commercial roofing

One of the main factors that affects the lifespan of a built-up roof is the number of layers, or plies, it has. Each layer can add approximately five years of life to the roof, but no system will have less than three layers.

Additionally, the quality of installation can impact the longevity of the roof. A well-installed BUR system can last up to 30 years, whereas a poorly installed one may only last 10 to 15 years.

It’s also important to note that regular maintenance and inspections can extend the lifespan of a built-up roof. Small issues, such as cracks or leaks, can be addressed before they turn into major problems that require a full roof replacement.

By keeping up with maintenance and addressing issues promptly, you can maximize the lifespan of your BUR and avoid costly repairs down the line.

Fundamentals of Built-Up Roofing

Composition and Types

Built-up roofing (BUR) is a type of roofing system that consists of multiple layers of reinforcing fabric, ply sheets, and bitumen. The layers are typically bonded together with hot asphalt or tar.

The top layer of the roof is usually covered with gravel or other types of aggregate to protect it from the sun and weather.

There are different types of built-up roofing systems, but the most common ones are the traditional and modified bitumen systems.

The traditional BUR system is made up of alternating layers of bitumen and reinforcing fabric. Meanwhile, the modified bitumen system uses a combination of asphalt and rubber modifiers to improve its performance.

Comparing Lifespans of Roofing Materials

When it comes to comparing the lifespans of roofing materials, built-up roofing systems are known to last longer than many other types of roofing materials.

For instance, asphalt shingles typically last between 15 and 30 years, while metal roofs can last up to 50 years.

Concrete and clay tiles can last up to 50 years as well, while slate and wood roofs can last up to 100 years.

Built-up roofing systems, on the other hand, can last up to 30 years or more, depending on the quality of installation and the number of layers (or plies) the roof has. Each layer can add approximately five years of life to the roof, but no system will have less than three layers.

Modified bitumen roofing systems can also last up to 30 years, while single-ply roofing systems such as TPO and EPDM can last up to 20 years.

However, the actual lifespan of a roofing system depends on various factors such as the quality of installation, maintenance, and weather conditions. See biggest roofing company in the us.

Maximizing the Longevity of a Built-Up Roof

To ensure that your built-up roof lasts as long as possible, there are a few key steps you can take. Proper installation and maintenance are crucial, as is recognizing and addressing common issues.

Proper Installation and Maintenance

The quality of installation is one of the most important factors in determining the longevity of your built-up roof. It is essential that you hire a reputable contractor who has experience with this type of roofing system.

Poor installation can lead to a host of problems, including leaks, blisters, and waves.

In addition to proper installation, regular maintenance is key to maximizing the lifespan of your built-up roof.

This includes regular cleaning to remove debris and dirt, as well as inspections to identify any potential issues before they become major problems.

You should also address any necessary repairs promptly to prevent further damage.

Recognizing and Addressing Common Issues

There are several common issues that can affect the lifespan of your built-up roof. These include blisters, cracks, and open joints. These issues can allow water to seep in and cause damage. UV rays and weather conditions can also take a toll on your roof, causing it to deteriorate over time.

To address these issues, have your roof inspected regularly by a professional. They can identify any potential problems and recommend the appropriate repairs. In addition, you may want to consider adding a reflective coating or surfacing materials to your roof to help protect it from the sun’s rays and extend its lifespan.

Proper ventilation and insulation are also important factors in maximizing the longevity of your built-up roof. Attic ventilation can help prevent ice dams and maintain proper temperature and moisture levels. Meanwhile, insulation can help improve energy efficiency and prevent heat loss.

While built-up roofs are known for their durability and longevity, they do require effective care and maintenance to ensure they last as long as possible. By following these tips and working with a reputable contractor, you can help extend the lifespan of your built-up roof and avoid the costs of a new roof for up to 40 years.

How to Achieve an Expensive Look for Your Cabinets

“If you’re looking to give your kitchen a facelift without breaking the bank, upgrading your cabinets is a great place to start. Even if you’re on a tight budget, there are simple and affordable ways to make your cabinets look more expensive.” said Leona Rodriguesi of Mornington cabinet maker.

A luxurious kitchen with sleek, high-quality cabinets, adorned with elegant hardware and under-cabinet lighting for a sophisticated and expensive look

With a few clever tricks and a bit of DIY know-how, you can transform your kitchen into an expensive-looking space that will impress your guests.

One of the easiest ways to make your cabinets look more expensive is to paint them. A fresh coat of paint can instantly update the look of your cabinets and make them look brand new.

Choose a high-quality paint in a classic, neutral shade like white or cream to create a timeless look that won’t go out of style. If you’re feeling bold, you could also go for a darker shade like navy blue or forest green to add some drama and sophistication to your kitchen.

Another way to upgrade your cabinets is to change the hardware. Swapping out your old, dated knobs and handles for new, stylish ones can make a big difference in the overall look of your cabinets.

Choose hardware in a finish that complements the rest of your kitchen decor, such as brushed nickel or brass. You could also opt for unique hardware that makes a statement, like crystal knobs or leather handles.

With these simple upgrades, you can create an expensive-looking kitchen without spending a fortune.

Enhancing Cabinet Aesthetics

If you’re looking to enhance the aesthetics of your kitchen cabinets, there are several ways you can achieve a more elevated, custom look. With Leona Rodriguesi of Mornington cabinet maker, we’ll cover some key strategies to help you achieve a more modern, sleek appearance for your cabinets.

Choosing the Right Paint

One of the easiest and most cost-effective ways to give your cabinets a new look is to repaint them.

When choosing a paint color, consider the overall style and color scheme of your kitchen.

If you’re looking for a more luxurious, high-end look, consider opting for darker, richer colors like navy blue or charcoal gray. These shades can give your cabinets a sophisticated, elegant feel that is sure to impress.

Upgrading Hardware

Another way to enhance the look of your cabinets is to upgrade your hardware.

Swapping out your old knobs and handles for new ones can give your cabinets a fresh, updated look.

When choosing new hardware, consider the finish you want. Brass and nickel are popular choices that can add a touch of elegance to your cabinets.

Incorporating Luxurious Finishes

Finally, consider incorporating luxurious finishes like molding, crown molding, and trim.

These finishes can add texture and depth to your cabinets, giving them a more custom, high-end look.

When choosing finishes, consider the overall style of your kitchen and choose finishes that complement that style.

Strategic Kitchen Design Elements

When it comes to making your kitchen cabinets look more expensive, there are several strategic design elements that can help you achieve the desired effect.

Effective Lighting Solutions

Lighting is an essential element of any kitchen design, and it can have a significant impact on the overall look and feel of your space.

Consider incorporating a combination of task lighting, such as under-cabinet lighting, and decorative lighting, such as pendants or light fixtures, to create visual interest and depth.

Maximising Layout and Functionality

Maximizing the layout and functionality of your kitchen can also help to make your cabinets look more expensive.

Consider incorporating an island or peninsula to create additional storage and counter space. You can also experiment with different countertop materials, such as stone or oak, to create a more bespoke and modern look.

Accessorising and Decluttering

Accessorising your kitchen with personality-rich dishware, window treatments, and fabric can also elevate the look of your cabinets. However, it is important to keep clutter to a minimum. Also, ensure that your cleaning supplies are stored out of sight.

Consider incorporating peel-and-stick tiles or shape accents to create visual contrast and interest.

By incorporating these design elements into your kitchen, you can create a more expensive and luxurious look without breaking the bank. Whether you’re embarking on a DIY project or a full-scale remodel, these tips can help you achieve the look you desire.

Why Installing Kitchen Cabinets is Expensive: Understanding the Cost Factors

Installing kitchen cabinets can be a costly endeavor. Homeowners often wonder why the expense is so high. The truth is, several factors contribute to the high cost of kitchen cabinets.

a newly installed kitchen cabinets

Leona Rodriguesi of Mornington cabinet maker highlights that “One of the primary reasons why kitchen cabinets are so expensive is the materials used to make them. Cabinets are often made from high-quality wood, which can be costly. Additionally, cabinets may feature built-in features like drawers and pantries, which add to the overall cost. The design of the cabinets also plays a role, as more intricate designs can be more expensive to produce.”

Factors Influencing the Cost of Kitchen Cabinets

When it comes to installing kitchen cabinets, the cost can vary greatly depending on several factors. In this section, we will discuss the main factors that influence the cost of kitchen cabinets.

Materials and Construction

One of the most significant factors affecting the cost of kitchen cabinets is the materials used in their construction. Cabinets made from solid hardwoods such as oak, maple, and hickory are generally more expensive than those made from MDF or veneer.

Solid wood cabinets are more durable and can last longer, but they also require more maintenance and care.

Another factor that affects the cost of kitchen cabinets is the construction method. Custom-made cabinets are usually more expensive than stock cabinets because they are made to order and require more time and effort to construct. However, custom cabinets offer more options for features and customization, such as lazy susans, cutting boards, wine racks, and custom spice pantries.

Design and Customisation

The design and customisation of kitchen cabinets can also significantly affect their cost. Door styles that require routing or embellishment, for example, will cost more than flat profile cabinets.

The more customised the cabinets are, the higher the cost will be. For lesser cost, you can visit Mornington cabinet maker.

Custom cabinets offer more design options and can be tailored to fit the specific needs of your kitchen. They can be made to fit any space, regardless of size or shape, and can include features such as drawers, shelves, and specialty pieces.

Hardware and Finishing Touches

Hardware and finishing touches can also contribute to the cost of kitchen cabinets. Hinges, handles, latches, and drawer pulls can vary in price depending on the material and finish.

Metal hardware, silver hardware, and plated hardware are typically more expensive than plastic or painted hardware.

Soft-closing doors and drawers are also a popular feature that can add to the cost of kitchen cabinets. These doors and drawers have a self-closing ability that prevents slamming and extends the life of the cabinets. Finishes such as glazing, patinas, and Danish oil can also add to the cost of kitchen cabinets.

Installation and Additional Costs

When installing kitchen cabinets, several additional costs need to be considered. These costs can add up quickly, so it’s important to factor them into your budget before you start your kitchen remodel.

Labour and Expertise

One of the biggest costs associated with installing kitchen cabinets is the labour cost. Installing cabinets requires precision and expertise, and it’s not a job that you should attempt to do yourself unless you have experience.

Hiring a professional installer will ensure that your cabinets are installed correctly and that they will last for years to come. The cost of labour will depend on the complexity of the installation and the experience of the installer.

Removal and Renovation Considerations

If you’re replacing your existing cabinets, you’ll need to factor in the cost of removal and disposal. Removing cabinets can be a time-consuming and messy process, and it’s important to do it correctly to avoid damaging your walls or floors.

Additionally, if you’re planning to renovate your kitchen, you’ll need to factor in the cost of any additional work that needs to be done. This can include things like installing a new sink, upgrading your appliances, or adding additional storage space.

Delivery and Additional Features

When you’re purchasing kitchen cabinets, you’ll need to factor in the cost of delivery. Shipping costs can vary depending on the size and weight of your cabinets, as well as your location.

Additionally, if you’re looking to add any additional features to your cabinets, such as step stools, pull-out trash brackets, or built-in wine racks, you’ll need to factor in the cost of these as well.

These added functionalities can increase the overall price of your cabinets, but they can also make your kitchen more functional and efficient.

How to Estimate Your Roof Size: A Step-by-Step Guide

Estimating the size of your roof is an important step in any roofing project.

Whether you are planning to repair or replace your roof, you need to know the size of the area that needs to be covered.

This will help you determine the amount of roofing materials you will need and the cost of the project.

With Charles Jimerson of Commercial Roofing NJ, we will guide you through the process of estimating your roof size.

a newly installed roof of a home

To estimate your roof size, you need to measure the area of your roof.

This can be done by calculating the square footage of each section of your roof and adding them together.

You can use a roofing calculator or do the math yourself.

It is important to be as accurate as possible when measuring your roof. This ensures that you purchase the right amount of materials and avoid any unnecessary expenses.

The size of your roof can also affect the cost of your project.

The larger the roof, the more materials you will need, and the more labor will be required.

However, a larger roof may also mean a lower cost per square foot, as there are economies of scale in larger projects.

By accurately estimating the size of your roof, you can plan your project more effectively and avoid any surprises along the way.

Understanding Roof Dimensions and Calculations

When it comes to estimating your roof size, it’s important to understand the basic calculations involved.

This section will provide you with the knowledge you need to accurately measure your roof area, determine its pitch, and calculate the number of squares required for your roofing project.

Measuring Roof Area

To measure your roof area, you’ll need to determine the length and width of each section of your roof.

For a simple gable roof, this can be done by measuring the length and width of each section and multiplying them together to get the area of each plane.

If your roof has different sections or features, divide it into rectangles or triangles and find the area of each part individually.

To be as accurate as possible, it’s important to measure both the horizontal run and vertical rise of your roof.

You can then use the rise over run formula to determine your roof pitch and calculate the roof area accordingly.

Determining Roof Pitch

Roof pitch, also known as roof slope, is a measure of how steep your roof is.

It’s typically expressed as a ratio of the roof’s rise over its run. For example, a roof with a rise of 6 inches for every 12 inches of run would have a pitch of 6:12 or a 1:2 pitch.

Determining your roof pitch is important because it affects the amount of roofing material you’ll need.

You can use a roof pitch multiplier chart to determine the multiplier for your specific pitch. Then, you can use this multiplier to calculate the number of squares required for your roofing project.

Calculating Roof Squares

Roof squares are a unit of measurement used in the roofing industry to determine the amount of roofing material needed for a project.

One square is equal to 100 square feet of roofing area.

To calculate the number of squares required for your roofing project, divide the total roof area by 100.

For example, if your roof area is 1,500 square feet, you’ll need 15 squares of roofing material.

Factors Affecting Roof Size Estimation

When estimating the size of your roof, there are several factors to consider. These factors can affect the total cost of the project, as well as the amount of materials needed. Here are some of the most important factors to keep in mind:

Accounting for Roof Features

Roofs can have a variety of features that can affect the size and complexity of the project.

Skylights, chimneys, and dormers are just a few examples of features that can impact the calculations.

When measuring your roof, be sure to take these features into account and adjust your calculations accordingly.

Additionally, if your roof has any damage or needs repairs, these factors should also be taken into consideration.

Considering Roofing Materials

The type of roofing material you choose can also affect the size and cost of the project.

Asphalt shingles are a popular choice due to their affordability and ease of installation, but metal roofing and clay tiles can also be viable options.

Different materials require different amounts of materials and labor, which can significantly affect the overall cost of the project.

When estimating the size of your roof, be sure to take into account the type of material you plan to use.

Estimating Labor and Total Costs

In addition to materials, labor costs are another important factor to consider when estimating the size of your roof.

Labor costs can vary depending on your location, the complexity of the project, and the experience of the contractor.

Be sure to factor in both materials and labor costs when calculating the total cost of the project. This will give you a more accurate estimate of the total cost of the project.

Estimating the size of your roof requires careful calculations and consideration of several factors. By taking into account roof features, roofing materials, and labor costs, you can get a more accurate estimate of the total cost of your roofing project.

If you are unsure about any of these factors, it may be helpful to consult with a roofing contractor like Commercial Roofing NJ or use a roofing material calculator to get a more accurate estimate.

Can You Change Taps Without a Plumber? A DIY Guide

Dean Owens of Plumbers Warragul has to say “Are you wondering if you can change taps without a plumber? The answer is yes, you can. However, some plumbing jobs require a licensed professional. In Australia, regulations are in place to ensure that plumbing work is done safely and to a high standard.”

changing tap and pipes on sink

If you’re looking to replace a tap, it’s a relatively simple job that you can do yourself. You’ll need to turn off the water supply, remove the old tap, and install the new one. However, if you encounter any issues or are unsure about what you’re doing, it’s best to call a licensed plumber to avoid causing any damage or creating a safety hazard.

It’s important to note that there are limits to what DIY plumbing work you can do without a license. In Australia, certain plumbing jobs must be done by a licensed professional to ensure compliance with regulations and to protect the health and safety of the public. Always check the requirements in your state or territory before attempting any plumbing work yourself.

Understanding Tap Replacement

Assessing the Need for Replacement

Before you start replacing your tap, it is important to assess the need for replacement. If your tap is leaking or has become difficult to turn on and off, it may be time to replace it. In some cases, a faulty washer may be the cause of the problem, which can be easily replaced. However, if your tap is old or has signs of corrosion, it is best to replace it entirely.

Tools and Materials Required

To replace a tap, you will need a few tools and materials. These include an adjustable wrench, screwdriver, Teflon tape, and a new tap. It is also important to turn off the water supply to the tap before you begin any work. You can do this by using the isolating valve or turning off the water meter.

Safety and Preparation

Before you start replacing your tap, it is important to take some safety precautions. Make sure to wear gloves and eye protection to protect yourself from any sharp edges or debris. It is also important to disconnect any hot water supply to the tap to avoid any burns or scalding.

Once you have assessed the need for replacement, gathered the necessary tools and materials, and taken the necessary safety precautions, you can begin replacing your tap.

Start by removing the old tap by using a wrench to loosen the nut that holds it in place. Make sure to turn it counterclockwise to loosen it.

Once the old tap is removed, clean the threads on the pipes and attach the new tap by screwing it onto the threads. Make sure to use Teflon tape to ensure a tight fit. Tighten the nut with a wrench, but be careful not to overtighten it.

Executing the Tap Change

Changing taps is a relatively simple DIY plumbing job that you can do yourself without the need for a professional plumber. In this section, we will guide you through the process of executing a tap change in your kitchen or bathroom.

Removing the Old Tap

Before you can install a new tap, you need to remove the old one. Start by turning off the water supply to the tap. You can usually find the isolation valve under the sink or basin. If you can’t find the valve, turn off the main water supply to your house.

Next, remove the tap’s cover plate or decorative cap. You can use a flathead screwdriver to do this. Once you remove the cover plate, you will see the tap’s fixing nut. Use a spanner or adjustable wrench to loosen the nut and remove the tap.

Installing the New Tap

Once you have removed the old tap, it’s time to install the new one. Start by placing the rubber gasket or O-ring on the base of the tap. Insert the tap through the hole in the sink or basin and secure it with the fixing nut. Tighten the nut with a spanner or adjustable wrench.

Next, connect the tap’s flexible hoses to the water supply pipes. Ensure that you use the correct fittings for your tap and pipes. Tighten the fittings with a spanner or adjustable wrench. Turn on the water supply and check for any leaks.

Final Checks and Testing

After installing the new tap, turn on the water supply and check for any leaks. If you notice any leaks, turn off the water supply and tighten the fittings further.

Once you are satisfied that there are no leaks, replace the cover plate or decorative cap.

Congratulations! You have successfully changed your tap without the need for a professional plumber. Remember to test the tap’s functionality by turning it on and off several times. If you encounter any issues, contact a licensed plumber for assistance.

Dean Owens of Plumbers Warragul highlights that “It is important to note that if you are renovating your kitchen or bathroom, you may need to obtain a compliance certificate for any plumbing work you do.”

This certificate confirms that the work complies with Australian plumbing standards and is required by your insurance company in case of any future claims.

What is the Difference Between Plumbing and Pipes? A Clear Explanation

When it comes to plumbing, there are many terms and concepts that can be confusing. One common question is: what is the difference between plumbing and pipes? Let us know it with Dean Owens of Plumber Warragul.

plumbing pipes connections

While the two terms are related, they are not interchangeable. Understanding the difference can help you better maintain and repair your plumbing system.

In general, plumbing refers to the entire system of pipes, fixtures, and appliances that make up a building’s water and drainage system. This includes everything from the water supply coming into the building to the sewer line that takes wastewater away.

Pipes, on the other hand, are just one component of the plumbing system. Pipes are the tubes that transport water and other materials through the plumbing system.

Understanding Plumbing and Pipes

Definition and Scope of Plumbing

Plumbing is the system of pipes, fixtures, and other apparatuses used for the distribution of water supply, drainage, and sewage, as well as for gas supply in residential, commercial, and industrial buildings. The plumbing system is an essential part of any building as it ensures the safe and efficient distribution of water and other fluids.

Plumbing systems are designed to meet specific needs and requirements, depending on the type of building and the intended use of the plumbing.

For example, residential plumbing systems are designed to supply clean water for drinking, cooking, and bathing, as well as to remove wastewater and sewage from the building.

On the other hand, commercial and industrial plumbing systems are designed to handle larger volumes of water and other fluids. They may also include specialized systems for specific purposes, such as cooling or heating.

Types of Pipes and Their Uses

Pipes are an essential component of any plumbing system, as they are used to transport fluids from one place to another. There are several types of pipes used in plumbing systems, each with its own unique characteristics and uses.

  1. Copper Pipes: Copper pipes are commonly used in residential plumbing systems, as they are durable, corrosion-resistant, and can withstand high temperatures and pressures. They are often used for hot and cold water supply lines, as well as for gas supply lines.
  2. PVC Pipes: PVC (Polyvinyl Chloride) pipes are lightweight, easy to install, and cost-effective, making them a popular choice for residential plumbing systems. They are commonly used for drainage and sewage systems, as well as for vent pipes and cold water supply lines.
  3. PEX Pipes: PEX (Cross-linked Polyethylene) pipes are flexible, easy to install, and resistant to corrosion, making them a popular choice for residential plumbing systems. They are often used for hot and cold water supply lines, as well as for radiant heating systems.

Materials in Pipe Construction

The materials used in pipe construction depend on the intended use of the pipe, as well as the specific requirements of the plumbing system. Some common materials used in pipe construction include:

  1. Copper: Copper is a durable, corrosion-resistant metal that is often used in plumbing systems for hot and cold water supply lines, as well as for gas supply lines.
  2. PVC: PVC is a synthetic plastic polymer that is lightweight, easy to install, and cost-effective. It is commonly used for drainage and sewage systems, as well as for vent pipes and cold water supply lines.
  3. PEX: PEX is a flexible, cross-linked polyethylene material that is resistant to corrosion and easy to install. It is often used for hot and cold water supply lines, as well as for radiant heating systems.

Comparative Analysis of Plumbing and Piping

Functional Differences

Plumbing and piping are two distinct systems that serve different purposes. Plumbing is primarily used for the distribution of potable water and the removal of wastewater from homes and buildings. Piping, on the other hand, is used in industrial applications to transport fluids, gases, and other materials.

While plumbing follows municipal codes, process piping contractors follow engineering standards and regulations, such as ASCME and OSHA standards.

Some process piping functions include mixing and separating fluids, stopping and starting fluid flow, and conveying substances over longer distances.

Material Characteristics and Selection

Plumbing and piping systems are made of different materials, each with its own unique characteristics.

Copper pipes are commonly used in plumbing systems due to their durability, resistance to corrosion, and ability to withstand high water pressure. Meanwhile, PVC and plastic pipes are also popular choices due to their affordability, lightweight, and flexibility.

In contrast, piping systems used in industrial applications require materials that can withstand harsh chemical environments. Materials such as stainless steel, high-density polyethylene, and thermoplastic resin are commonly used in process piping due to their strength, resistance to corrosion, and durability.

Installation, Maintenance, and Regulations

Plumbing and piping systems need different practices for installation, maintenance, and regulations.

Plumbing systems are installed and maintained by licensed plumbers like Plumber Warragul. They follow local building codes and regulations. These regulations make sure that the plumbing system is safe. They also make sure that it meets health and sanitation standards.

Meanwhile, process piping is installed and maintained by specialized contractors. They follow engineering standards and regulations. These regulations make sure that the piping system is safe. They also make sure that it meets the specific needs of the industrial application.

In terms of maintenance, plumbing systems need regular inspections and cleaning. This is to ensure that the system is functioning properly. It also prevents the buildup of harmful bacteria.

On the other hand, process piping systems need regular maintenance to prevent leaks, corrosion, and other issues. These can compromise the integrity of the system.