Will Roofing Costs Decrease in 2024? A Look at Industry Trends and Predictions

If you’re planning to replace or install a new roof in 2024, you may be wondering if roofing costs will go down. See it in commercial roofing companies nj.

house in need of roof replacement

The cost of roofing materials and construction pricing has been on the rise in recent years. This has caused concerns among homeowners and commercial building owners alike. However, predicting future roofing costs can be challenging due to various factors that can influence the market.

According to a recent study, the average cost of a roof replacement in the US ranges from $9,000 to $17,600 for a 2,000-2,200 sq. ft. roof on a single-family house up to two-stories high. The cost of a new roof depends on various factors, such as the type of roofing material, the size of the roof, the complexity of the installation, and the location of the property. While the cost of roofing materials has been on the rise, there are some factors that could potentially lead to a decrease in roofing costs in 2024.

One factor that could influence roofing costs in 2024 is the state of the economy. Economic downturns can lead to a decrease in demand for roofing services, which could lead to lower prices. Additionally, advancements in technology and changes in the roofing industry could lead to more efficient and cost-effective roofing solutions.

While it’s difficult to predict exactly how roofing costs will change in 2024, understanding the factors that influence the market can help you make informed decisions when it comes to your roofing needs.

Factors Influencing Roofing Costs in 2024

When it comes to roofing costs in 2024, there are several factors that will influence the prices you can expect to pay for roofing services. Here are some of the most significant factors that will impact roofing costs in 2024:

Material Costs and Availability

The cost and availability of roofing materials will continue to be a major factor that affects roofing costs in 2024.

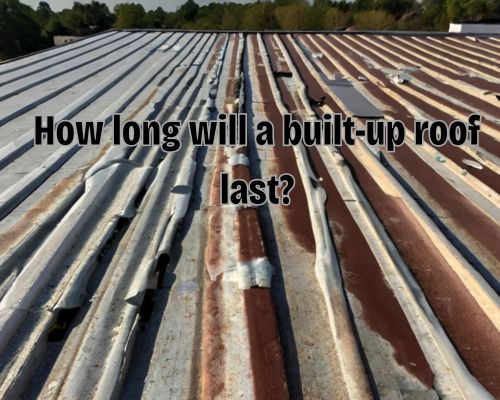
The prices of roofing materials, such as asphalt shingles, metal roofing, and underlayment, can be affected by various factors, including the cost of oil, inflation, and natural disasters. For instance, hurricanes and hailstorms can cause a temporary increase in roofing material prices due to supply chain disruptions and increased demand.

Labor Market Dynamics

The cost of labor is another significant factor that will impact roofing costs in 2024.

The availability of skilled roofing contractors or commercial roofing companies nj, their level of experience, and the cost of labor will all play a role in determining the final cost of your roofing project. Moreover, the pandemic has caused some changes in the labor market, including the adoption of safety protocols, which may affect the cost of labor in the long run.

Economic and Environmental Factors

Economic and environmental factors can also influence roofing costs in 2024.

Inflation, for example, can cause the prices of roofing materials and labor to increase over time. Additionally, the shift towards sustainable and eco-friendly roofing solutions may impact the prices of roofing materials in the future.

Considerations for Homeowners

When it comes to roofing, homeowners have a lot to consider. Here are some important factors to keep in mind before deciding whether to repair or replace your roof.

Roof Replacement vs. Repair

Before making any decisions, it’s important to determine whether your roof needs a full replacement or just a repair.

If your roof is relatively new and only has minor damage, a repair may be all that’s needed. However, if your roof is older or has sustained significant damage, a full replacement may be necessary.

Additional Costs and Savings

In addition to the cost of a new roof or roof replacement, there are other expenses to consider.

For example, the size and pitch of your roof can affect the cost of the project. Additionally, the location of your home, design choices, and accessories like skylights and chimneys can all impact the final cost.

It’s also important to factor in the long-term savings of a new roof. A durable, high-quality roof can help reduce energy costs and prevent costly repairs down the line. Some manufacturers also offer warranties that can provide additional protection and peace of mind.

Regular Maintenance and Inspections

Regular maintenance and inspections can help extend the life of your roof and prevent costly repairs.

It’s important to have your roof inspected by a professional at least once a year, and to address any issues as soon as they arise. Regular cleaning and removal of debris can also help prevent damage and prolong the life of your roof.

Permits and Clean-Up Costs

Before beginning any roofing project, it’s important to obtain any necessary permits and to factor in clean-up costs.

A reputable roofing contractor should be able to provide a detailed breakdown of all costs associated with your project, including any necessary permits and clean-up fees.

Discounts and Workmanship Warranties

Finally, it’s important to choose a reputable roofing contractor who offers a workmanship warranty. This can provide additional protection and peace of mind in the event that any issues arise after the project is complete.

Additionally, some contractors may offer discounts or financing options to help make the project more affordable.

By considering these factors and working with a reputable roofing professional, you can make informed decisions for your roofing project and ensure that your home is protected for years to come.

How Long Will a Built-Up Roof Last? A Comprehensive Guide

When it comes to commercial roofing, built-up roofing (BUR) is a popular choice due to its durability and longevity. However, as a property owner or manager, you may be wondering: how long will a built-up roof last? Get to know it with the biggest roofing company in the us.

The answer depends on a variety of factors. With proper installation and maintenance, a BUR can last anywhere from 20 to 40 years.

metal commercial roofing

One of the main factors that affects the lifespan of a built-up roof is the number of layers, or plies, it has. Each layer can add approximately five years of life to the roof, but no system will have less than three layers.

Additionally, the quality of installation can impact the longevity of the roof. A well-installed BUR system can last up to 30 years, whereas a poorly installed one may only last 10 to 15 years.

It’s also important to note that regular maintenance and inspections can extend the lifespan of a built-up roof. Small issues, such as cracks or leaks, can be addressed before they turn into major problems that require a full roof replacement.

By keeping up with maintenance and addressing issues promptly, you can maximize the lifespan of your BUR and avoid costly repairs down the line.

Fundamentals of Built-Up Roofing

Composition and Types

Built-up roofing (BUR) is a type of roofing system that consists of multiple layers of reinforcing fabric, ply sheets, and bitumen. The layers are typically bonded together with hot asphalt or tar.

The top layer of the roof is usually covered with gravel or other types of aggregate to protect it from the sun and weather.

There are different types of built-up roofing systems, but the most common ones are the traditional and modified bitumen systems.

The traditional BUR system is made up of alternating layers of bitumen and reinforcing fabric. Meanwhile, the modified bitumen system uses a combination of asphalt and rubber modifiers to improve its performance.

Comparing Lifespans of Roofing Materials

When it comes to comparing the lifespans of roofing materials, built-up roofing systems are known to last longer than many other types of roofing materials.

For instance, asphalt shingles typically last between 15 and 30 years, while metal roofs can last up to 50 years.

Concrete and clay tiles can last up to 50 years as well, while slate and wood roofs can last up to 100 years.

Built-up roofing systems, on the other hand, can last up to 30 years or more, depending on the quality of installation and the number of layers (or plies) the roof has. Each layer can add approximately five years of life to the roof, but no system will have less than three layers.

Modified bitumen roofing systems can also last up to 30 years, while single-ply roofing systems such as TPO and EPDM can last up to 20 years.

However, the actual lifespan of a roofing system depends on various factors such as the quality of installation, maintenance, and weather conditions. See biggest roofing company in the us.

Maximizing the Longevity of a Built-Up Roof

To ensure that your built-up roof lasts as long as possible, there are a few key steps you can take. Proper installation and maintenance are crucial, as is recognizing and addressing common issues.

Proper Installation and Maintenance

The quality of installation is one of the most important factors in determining the longevity of your built-up roof. It is essential that you hire a reputable contractor who has experience with this type of roofing system.

Poor installation can lead to a host of problems, including leaks, blisters, and waves.

In addition to proper installation, regular maintenance is key to maximizing the lifespan of your built-up roof.

This includes regular cleaning to remove debris and dirt, as well as inspections to identify any potential issues before they become major problems.

You should also address any necessary repairs promptly to prevent further damage.

Recognizing and Addressing Common Issues

There are several common issues that can affect the lifespan of your built-up roof. These include blisters, cracks, and open joints. These issues can allow water to seep in and cause damage. UV rays and weather conditions can also take a toll on your roof, causing it to deteriorate over time.

To address these issues, have your roof inspected regularly by a professional. They can identify any potential problems and recommend the appropriate repairs. In addition, you may want to consider adding a reflective coating or surfacing materials to your roof to help protect it from the sun’s rays and extend its lifespan.

Proper ventilation and insulation are also important factors in maximizing the longevity of your built-up roof. Attic ventilation can help prevent ice dams and maintain proper temperature and moisture levels. Meanwhile, insulation can help improve energy efficiency and prevent heat loss.

While built-up roofs are known for their durability and longevity, they do require effective care and maintenance to ensure they last as long as possible. By following these tips and working with a reputable contractor, you can help extend the lifespan of your built-up roof and avoid the costs of a new roof for up to 40 years.

How to Achieve an Expensive Look for Your Cabinets

“If you’re looking to give your kitchen a facelift without breaking the bank, upgrading your cabinets is a great place to start. Even if you’re on a tight budget, there are simple and affordable ways to make your cabinets look more expensive.” said Leona Rodriguesi of Mornington cabinet maker.

A luxurious kitchen with sleek, high-quality cabinets, adorned with elegant hardware and under-cabinet lighting for a sophisticated and expensive look

With a few clever tricks and a bit of DIY know-how, you can transform your kitchen into an expensive-looking space that will impress your guests.

One of the easiest ways to make your cabinets look more expensive is to paint them. A fresh coat of paint can instantly update the look of your cabinets and make them look brand new.

Choose a high-quality paint in a classic, neutral shade like white or cream to create a timeless look that won’t go out of style. If you’re feeling bold, you could also go for a darker shade like navy blue or forest green to add some drama and sophistication to your kitchen.

Another way to upgrade your cabinets is to change the hardware. Swapping out your old, dated knobs and handles for new, stylish ones can make a big difference in the overall look of your cabinets.

Choose hardware in a finish that complements the rest of your kitchen decor, such as brushed nickel or brass. You could also opt for unique hardware that makes a statement, like crystal knobs or leather handles.

With these simple upgrades, you can create an expensive-looking kitchen without spending a fortune.

Enhancing Cabinet Aesthetics

If you’re looking to enhance the aesthetics of your kitchen cabinets, there are several ways you can achieve a more elevated, custom look. With Leona Rodriguesi of Mornington cabinet maker, we’ll cover some key strategies to help you achieve a more modern, sleek appearance for your cabinets.

Choosing the Right Paint

One of the easiest and most cost-effective ways to give your cabinets a new look is to repaint them.

When choosing a paint color, consider the overall style and color scheme of your kitchen.

If you’re looking for a more luxurious, high-end look, consider opting for darker, richer colors like navy blue or charcoal gray. These shades can give your cabinets a sophisticated, elegant feel that is sure to impress.

Upgrading Hardware

Another way to enhance the look of your cabinets is to upgrade your hardware.

Swapping out your old knobs and handles for new ones can give your cabinets a fresh, updated look.

When choosing new hardware, consider the finish you want. Brass and nickel are popular choices that can add a touch of elegance to your cabinets.

Incorporating Luxurious Finishes

Finally, consider incorporating luxurious finishes like molding, crown molding, and trim.

These finishes can add texture and depth to your cabinets, giving them a more custom, high-end look.

When choosing finishes, consider the overall style of your kitchen and choose finishes that complement that style.

Strategic Kitchen Design Elements

When it comes to making your kitchen cabinets look more expensive, there are several strategic design elements that can help you achieve the desired effect.

Effective Lighting Solutions

Lighting is an essential element of any kitchen design, and it can have a significant impact on the overall look and feel of your space.

Consider incorporating a combination of task lighting, such as under-cabinet lighting, and decorative lighting, such as pendants or light fixtures, to create visual interest and depth.

Maximising Layout and Functionality

Maximizing the layout and functionality of your kitchen can also help to make your cabinets look more expensive.

Consider incorporating an island or peninsula to create additional storage and counter space. You can also experiment with different countertop materials, such as stone or oak, to create a more bespoke and modern look.

Accessorising and Decluttering

Accessorising your kitchen with personality-rich dishware, window treatments, and fabric can also elevate the look of your cabinets. However, it is important to keep clutter to a minimum. Also, ensure that your cleaning supplies are stored out of sight.

Consider incorporating peel-and-stick tiles or shape accents to create visual contrast and interest.

By incorporating these design elements into your kitchen, you can create a more expensive and luxurious look without breaking the bank. Whether you’re embarking on a DIY project or a full-scale remodel, these tips can help you achieve the look you desire.

Why Installing Kitchen Cabinets is Expensive: Understanding the Cost Factors

Installing kitchen cabinets can be a costly endeavor. Homeowners often wonder why the expense is so high. The truth is, several factors contribute to the high cost of kitchen cabinets.

a newly installed kitchen cabinets

Leona Rodriguesi of Mornington cabinet maker highlights that “One of the primary reasons why kitchen cabinets are so expensive is the materials used to make them. Cabinets are often made from high-quality wood, which can be costly. Additionally, cabinets may feature built-in features like drawers and pantries, which add to the overall cost. The design of the cabinets also plays a role, as more intricate designs can be more expensive to produce.”

Factors Influencing the Cost of Kitchen Cabinets

When it comes to installing kitchen cabinets, the cost can vary greatly depending on several factors. In this section, we will discuss the main factors that influence the cost of kitchen cabinets.

Materials and Construction

One of the most significant factors affecting the cost of kitchen cabinets is the materials used in their construction. Cabinets made from solid hardwoods such as oak, maple, and hickory are generally more expensive than those made from MDF or veneer.

Solid wood cabinets are more durable and can last longer, but they also require more maintenance and care.

Another factor that affects the cost of kitchen cabinets is the construction method. Custom-made cabinets are usually more expensive than stock cabinets because they are made to order and require more time and effort to construct. However, custom cabinets offer more options for features and customization, such as lazy susans, cutting boards, wine racks, and custom spice pantries.

Design and Customisation

The design and customisation of kitchen cabinets can also significantly affect their cost. Door styles that require routing or embellishment, for example, will cost more than flat profile cabinets.

The more customised the cabinets are, the higher the cost will be. For lesser cost, you can visit Mornington cabinet maker.

Custom cabinets offer more design options and can be tailored to fit the specific needs of your kitchen. They can be made to fit any space, regardless of size or shape, and can include features such as drawers, shelves, and specialty pieces.

Hardware and Finishing Touches

Hardware and finishing touches can also contribute to the cost of kitchen cabinets. Hinges, handles, latches, and drawer pulls can vary in price depending on the material and finish.

Metal hardware, silver hardware, and plated hardware are typically more expensive than plastic or painted hardware.

Soft-closing doors and drawers are also a popular feature that can add to the cost of kitchen cabinets. These doors and drawers have a self-closing ability that prevents slamming and extends the life of the cabinets. Finishes such as glazing, patinas, and Danish oil can also add to the cost of kitchen cabinets.

Installation and Additional Costs

When installing kitchen cabinets, several additional costs need to be considered. These costs can add up quickly, so it’s important to factor them into your budget before you start your kitchen remodel.

Labour and Expertise

One of the biggest costs associated with installing kitchen cabinets is the labour cost. Installing cabinets requires precision and expertise, and it’s not a job that you should attempt to do yourself unless you have experience.

Hiring a professional installer will ensure that your cabinets are installed correctly and that they will last for years to come. The cost of labour will depend on the complexity of the installation and the experience of the installer.

Removal and Renovation Considerations

If you’re replacing your existing cabinets, you’ll need to factor in the cost of removal and disposal. Removing cabinets can be a time-consuming and messy process, and it’s important to do it correctly to avoid damaging your walls or floors.

Additionally, if you’re planning to renovate your kitchen, you’ll need to factor in the cost of any additional work that needs to be done. This can include things like installing a new sink, upgrading your appliances, or adding additional storage space.

Delivery and Additional Features

When you’re purchasing kitchen cabinets, you’ll need to factor in the cost of delivery. Shipping costs can vary depending on the size and weight of your cabinets, as well as your location.

Additionally, if you’re looking to add any additional features to your cabinets, such as step stools, pull-out trash brackets, or built-in wine racks, you’ll need to factor in the cost of these as well.

These added functionalities can increase the overall price of your cabinets, but they can also make your kitchen more functional and efficient.

How to Estimate Your Roof Size: A Step-by-Step Guide

Estimating the size of your roof is an important step in any roofing project.

Whether you are planning to repair or replace your roof, you need to know the size of the area that needs to be covered.

This will help you determine the amount of roofing materials you will need and the cost of the project.

With Charles Jimerson of Commercial Roofing NJ, we will guide you through the process of estimating your roof size.

a newly installed roof of a home

To estimate your roof size, you need to measure the area of your roof.

This can be done by calculating the square footage of each section of your roof and adding them together.

You can use a roofing calculator or do the math yourself.

It is important to be as accurate as possible when measuring your roof. This ensures that you purchase the right amount of materials and avoid any unnecessary expenses.

The size of your roof can also affect the cost of your project.

The larger the roof, the more materials you will need, and the more labor will be required.

However, a larger roof may also mean a lower cost per square foot, as there are economies of scale in larger projects.

By accurately estimating the size of your roof, you can plan your project more effectively and avoid any surprises along the way.

Understanding Roof Dimensions and Calculations

When it comes to estimating your roof size, it’s important to understand the basic calculations involved.

This section will provide you with the knowledge you need to accurately measure your roof area, determine its pitch, and calculate the number of squares required for your roofing project.

Measuring Roof Area

To measure your roof area, you’ll need to determine the length and width of each section of your roof.

For a simple gable roof, this can be done by measuring the length and width of each section and multiplying them together to get the area of each plane.

If your roof has different sections or features, divide it into rectangles or triangles and find the area of each part individually.

To be as accurate as possible, it’s important to measure both the horizontal run and vertical rise of your roof.

You can then use the rise over run formula to determine your roof pitch and calculate the roof area accordingly.

Determining Roof Pitch

Roof pitch, also known as roof slope, is a measure of how steep your roof is.

It’s typically expressed as a ratio of the roof’s rise over its run. For example, a roof with a rise of 6 inches for every 12 inches of run would have a pitch of 6:12 or a 1:2 pitch.

Determining your roof pitch is important because it affects the amount of roofing material you’ll need.

You can use a roof pitch multiplier chart to determine the multiplier for your specific pitch. Then, you can use this multiplier to calculate the number of squares required for your roofing project.

Calculating Roof Squares

Roof squares are a unit of measurement used in the roofing industry to determine the amount of roofing material needed for a project.

One square is equal to 100 square feet of roofing area.

To calculate the number of squares required for your roofing project, divide the total roof area by 100.

For example, if your roof area is 1,500 square feet, you’ll need 15 squares of roofing material.

Factors Affecting Roof Size Estimation

When estimating the size of your roof, there are several factors to consider. These factors can affect the total cost of the project, as well as the amount of materials needed. Here are some of the most important factors to keep in mind:

Accounting for Roof Features

Roofs can have a variety of features that can affect the size and complexity of the project.

Skylights, chimneys, and dormers are just a few examples of features that can impact the calculations.

When measuring your roof, be sure to take these features into account and adjust your calculations accordingly.

Additionally, if your roof has any damage or needs repairs, these factors should also be taken into consideration.

Considering Roofing Materials

The type of roofing material you choose can also affect the size and cost of the project.

Asphalt shingles are a popular choice due to their affordability and ease of installation, but metal roofing and clay tiles can also be viable options.

Different materials require different amounts of materials and labor, which can significantly affect the overall cost of the project.

When estimating the size of your roof, be sure to take into account the type of material you plan to use.

Estimating Labor and Total Costs

In addition to materials, labor costs are another important factor to consider when estimating the size of your roof.

Labor costs can vary depending on your location, the complexity of the project, and the experience of the contractor.

Be sure to factor in both materials and labor costs when calculating the total cost of the project. This will give you a more accurate estimate of the total cost of the project.

Estimating the size of your roof requires careful calculations and consideration of several factors. By taking into account roof features, roofing materials, and labor costs, you can get a more accurate estimate of the total cost of your roofing project.

If you are unsure about any of these factors, it may be helpful to consult with a roofing contractor like Commercial Roofing NJ or use a roofing material calculator to get a more accurate estimate.

Can You Change Taps Without a Plumber? A DIY Guide

Dean Owens of Plumbers Warragul has to say “Are you wondering if you can change taps without a plumber? The answer is yes, you can. However, some plumbing jobs require a licensed professional. In Australia, regulations are in place to ensure that plumbing work is done safely and to a high standard.”

changing tap and pipes on sink

If you’re looking to replace a tap, it’s a relatively simple job that you can do yourself. You’ll need to turn off the water supply, remove the old tap, and install the new one. However, if you encounter any issues or are unsure about what you’re doing, it’s best to call a licensed plumber to avoid causing any damage or creating a safety hazard.

It’s important to note that there are limits to what DIY plumbing work you can do without a license. In Australia, certain plumbing jobs must be done by a licensed professional to ensure compliance with regulations and to protect the health and safety of the public. Always check the requirements in your state or territory before attempting any plumbing work yourself.

Understanding Tap Replacement

Assessing the Need for Replacement

Before you start replacing your tap, it is important to assess the need for replacement. If your tap is leaking or has become difficult to turn on and off, it may be time to replace it. In some cases, a faulty washer may be the cause of the problem, which can be easily replaced. However, if your tap is old or has signs of corrosion, it is best to replace it entirely.

Tools and Materials Required

To replace a tap, you will need a few tools and materials. These include an adjustable wrench, screwdriver, Teflon tape, and a new tap. It is also important to turn off the water supply to the tap before you begin any work. You can do this by using the isolating valve or turning off the water meter.

Safety and Preparation

Before you start replacing your tap, it is important to take some safety precautions. Make sure to wear gloves and eye protection to protect yourself from any sharp edges or debris. It is also important to disconnect any hot water supply to the tap to avoid any burns or scalding.

Once you have assessed the need for replacement, gathered the necessary tools and materials, and taken the necessary safety precautions, you can begin replacing your tap.

Start by removing the old tap by using a wrench to loosen the nut that holds it in place. Make sure to turn it counterclockwise to loosen it.

Once the old tap is removed, clean the threads on the pipes and attach the new tap by screwing it onto the threads. Make sure to use Teflon tape to ensure a tight fit. Tighten the nut with a wrench, but be careful not to overtighten it.

Executing the Tap Change

Changing taps is a relatively simple DIY plumbing job that you can do yourself without the need for a professional plumber. In this section, we will guide you through the process of executing a tap change in your kitchen or bathroom.

Removing the Old Tap

Before you can install a new tap, you need to remove the old one. Start by turning off the water supply to the tap. You can usually find the isolation valve under the sink or basin. If you can’t find the valve, turn off the main water supply to your house.

Next, remove the tap’s cover plate or decorative cap. You can use a flathead screwdriver to do this. Once you remove the cover plate, you will see the tap’s fixing nut. Use a spanner or adjustable wrench to loosen the nut and remove the tap.

Installing the New Tap

Once you have removed the old tap, it’s time to install the new one. Start by placing the rubber gasket or O-ring on the base of the tap. Insert the tap through the hole in the sink or basin and secure it with the fixing nut. Tighten the nut with a spanner or adjustable wrench.

Next, connect the tap’s flexible hoses to the water supply pipes. Ensure that you use the correct fittings for your tap and pipes. Tighten the fittings with a spanner or adjustable wrench. Turn on the water supply and check for any leaks.

Final Checks and Testing

After installing the new tap, turn on the water supply and check for any leaks. If you notice any leaks, turn off the water supply and tighten the fittings further.

Once you are satisfied that there are no leaks, replace the cover plate or decorative cap.

Congratulations! You have successfully changed your tap without the need for a professional plumber. Remember to test the tap’s functionality by turning it on and off several times. If you encounter any issues, contact a licensed plumber for assistance.

Dean Owens of Plumbers Warragul highlights that “It is important to note that if you are renovating your kitchen or bathroom, you may need to obtain a compliance certificate for any plumbing work you do.”

This certificate confirms that the work complies with Australian plumbing standards and is required by your insurance company in case of any future claims.

What is the Difference Between Plumbing and Pipes? A Clear Explanation

When it comes to plumbing, there are many terms and concepts that can be confusing. One common question is: what is the difference between plumbing and pipes? Let us know it with Dean Owens of Plumber Warragul.

plumbing pipes connections

While the two terms are related, they are not interchangeable. Understanding the difference can help you better maintain and repair your plumbing system.

In general, plumbing refers to the entire system of pipes, fixtures, and appliances that make up a building’s water and drainage system. This includes everything from the water supply coming into the building to the sewer line that takes wastewater away.

Pipes, on the other hand, are just one component of the plumbing system. Pipes are the tubes that transport water and other materials through the plumbing system.

Understanding Plumbing and Pipes

Definition and Scope of Plumbing

Plumbing is the system of pipes, fixtures, and other apparatuses used for the distribution of water supply, drainage, and sewage, as well as for gas supply in residential, commercial, and industrial buildings. The plumbing system is an essential part of any building as it ensures the safe and efficient distribution of water and other fluids.

Plumbing systems are designed to meet specific needs and requirements, depending on the type of building and the intended use of the plumbing.

For example, residential plumbing systems are designed to supply clean water for drinking, cooking, and bathing, as well as to remove wastewater and sewage from the building.

On the other hand, commercial and industrial plumbing systems are designed to handle larger volumes of water and other fluids. They may also include specialized systems for specific purposes, such as cooling or heating.

Types of Pipes and Their Uses

Pipes are an essential component of any plumbing system, as they are used to transport fluids from one place to another. There are several types of pipes used in plumbing systems, each with its own unique characteristics and uses.

  1. Copper Pipes: Copper pipes are commonly used in residential plumbing systems, as they are durable, corrosion-resistant, and can withstand high temperatures and pressures. They are often used for hot and cold water supply lines, as well as for gas supply lines.
  2. PVC Pipes: PVC (Polyvinyl Chloride) pipes are lightweight, easy to install, and cost-effective, making them a popular choice for residential plumbing systems. They are commonly used for drainage and sewage systems, as well as for vent pipes and cold water supply lines.
  3. PEX Pipes: PEX (Cross-linked Polyethylene) pipes are flexible, easy to install, and resistant to corrosion, making them a popular choice for residential plumbing systems. They are often used for hot and cold water supply lines, as well as for radiant heating systems.

Materials in Pipe Construction

The materials used in pipe construction depend on the intended use of the pipe, as well as the specific requirements of the plumbing system. Some common materials used in pipe construction include:

  1. Copper: Copper is a durable, corrosion-resistant metal that is often used in plumbing systems for hot and cold water supply lines, as well as for gas supply lines.
  2. PVC: PVC is a synthetic plastic polymer that is lightweight, easy to install, and cost-effective. It is commonly used for drainage and sewage systems, as well as for vent pipes and cold water supply lines.
  3. PEX: PEX is a flexible, cross-linked polyethylene material that is resistant to corrosion and easy to install. It is often used for hot and cold water supply lines, as well as for radiant heating systems.

Comparative Analysis of Plumbing and Piping

Functional Differences

Plumbing and piping are two distinct systems that serve different purposes. Plumbing is primarily used for the distribution of potable water and the removal of wastewater from homes and buildings. Piping, on the other hand, is used in industrial applications to transport fluids, gases, and other materials.

While plumbing follows municipal codes, process piping contractors follow engineering standards and regulations, such as ASCME and OSHA standards.

Some process piping functions include mixing and separating fluids, stopping and starting fluid flow, and conveying substances over longer distances.

Material Characteristics and Selection

Plumbing and piping systems are made of different materials, each with its own unique characteristics.

Copper pipes are commonly used in plumbing systems due to their durability, resistance to corrosion, and ability to withstand high water pressure. Meanwhile, PVC and plastic pipes are also popular choices due to their affordability, lightweight, and flexibility.

In contrast, piping systems used in industrial applications require materials that can withstand harsh chemical environments. Materials such as stainless steel, high-density polyethylene, and thermoplastic resin are commonly used in process piping due to their strength, resistance to corrosion, and durability.

Installation, Maintenance, and Regulations

Plumbing and piping systems need different practices for installation, maintenance, and regulations.

Plumbing systems are installed and maintained by licensed plumbers like Plumber Warragul. They follow local building codes and regulations. These regulations make sure that the plumbing system is safe. They also make sure that it meets health and sanitation standards.

Meanwhile, process piping is installed and maintained by specialized contractors. They follow engineering standards and regulations. These regulations make sure that the piping system is safe. They also make sure that it meets the specific needs of the industrial application.

In terms of maintenance, plumbing systems need regular inspections and cleaning. This is to ensure that the system is functioning properly. It also prevents the buildup of harmful bacteria.

On the other hand, process piping systems need regular maintenance to prevent leaks, corrosion, and other issues. These can compromise the integrity of the system.

What is the Main Drain Pipe in a House Called? A Comprehensive Guide

If you’re a homeowner, you may have heard the term “main drain pipe” before. But what exactly is it, and what role does it play in your plumbing system? Let us know it with Dean Owens of Plumber Warragul.

A large vertical drain pipe runs from the upper floors to the basement, connecting all the plumbing fixtures in the house

In short, the main drain pipe is the primary channel that carries wastewater from various fixtures in your house to the municipal sewer system or a septic tank.

Understanding the main drain pipe is crucial for homeowners, as it provides insights into the infrastructure that supports a functional plumbing system and protects health and safety.

Each element of the house drainage system plays a crucial role, contributing to the overall effectiveness of the system.

From the drain trap to the branch drain and onward to the main drain, each component must be properly installed and maintained to ensure proper function.

In this article, we’ll take a closer look at the main drain pipe in a house, exploring its function, components, and common issues that homeowners may encounter.

Whether you’re dealing with a clogged drain or simply want to learn more about your plumbing system, this guide will provide you with the knowledge you need to keep your house’s drainage system running smoothly.

Understanding the Main Drain System

The main drain system is an essential component of any house plumbing system, responsible for the efficient and safe removal of used water and sewage from your home.

Understanding the components, function, and maintenance of the main drain system is crucial for homeowners to prevent water damage and ensure the longevity of their plumbing system.

Components of the Main Drain System

The main drain system consists of several interconnected components that work together to remove wastewater from your home.

The primary components include the main sewer line, branch drain lines, traps, and vents.

The main sewer line is the primary pipe that carries wastewater from your home to the public sewer or septic tank.

Branch drain lines are connected to each fixture drain, such as sinks, toilets, and showers, and lead to the main sewer line.

Traps are U-shaped pipes that prevent sewer gases and odors from entering your home. Vents are pipes that allow air to enter the drain system, preventing suction and allowing wastewater to flow freely.

The Role of Gravity and Pressure in Drainage

Gravity and pressure play a crucial role in the drainage of wastewater from your home.

Gravity is responsible for the flow of wastewater from higher to lower elevations, while pressure is responsible for pushing wastewater through the pipes and out of your home.

The main sewer line is typically installed with a slope of 1/4 inch per foot to ensure that wastewater flows freely.

Meanwhile, the branch drain lines are installed with a slope of 1/8 inch per foot to ensure that wastewater flows towards the main sewer line.

Common Issues and Maintenance

Common issues with the main drain system include blockages, clogs, leaks, and flooding.

Blockages and clogs can occur when foreign objects, grease, or other materials accumulate in the pipes and prevent wastewater from flowing freely.

Meanwhile, leaks can occur when pipes corrode or crack, allowing wastewater to seep into your home.

Lastly, flooding can occur when the main sewer line becomes clogged or overwhelmed with wastewater, causing sewage to back up into your home.

To prevent these issues, regular inspections and maintenance are necessary.

It is recommended to have a plumber like Plumber Warragul inspect your main drain system every two years to check for blockages, leaks, and other issues.

Additionally, regular drain cleaning can help prevent blockages and clogs.

If you hear gurgling noises or notice slow drainage, it may be a sign of a blockage or clog and should be addressed promptly.

Planning and Installation of Drainage Systems

When planning and installing a drainage system for your house, there are several factors you need to consider. In this section, we’ll go over some of the key design considerations, as well as regulations and inspections you need to be aware of when connecting to municipal systems or septic tanks.

Design Considerations for Effective Drainage

Effective drainage is essential to prevent water damage to your property and maintain a healthy living environment.

When designing your drainage system, you need to consider the following:

  • The slope of the land: The slope of the land will determine the direction and flow of water. You need to ensure that your drainage system is designed to accommodate the natural flow of water and prevent water from pooling in low-lying areas.
  • Soil type: The type of soil on your property will affect the absorption rate of water. If you have heavy clay soil, you may need to install a soakaway to prevent water from pooling on the surface.
  • Water fixtures: You need to consider the location of sinks, toilets, and other water fixtures when designing your drainage system. Fixture drains should be connected to the main drain pipe using PVC pipes to prevent leaks and blockages.

Connecting to Municipal Systems and Septic Tanks

If you’re connecting your drainage system to a municipal sewer system or septic tank, there are regulations you need to follow.

You may need to obtain permits and have your system inspected to ensure it meets local requirements. Some key considerations include:

  • Cleanouts: You need to ensure that your drainage system has cleanouts installed at regular intervals to allow for easy access and maintenance.
  • Manholes: If your system is connected to a municipal sewer system, you may need to install manholes to allow for access to the main sewer line.
  • Sewage treatment plant: If you’re not connecting to a municipal sewer system, you may need to install a sewage treatment plant to treat and dispose of wastewater.

Regulations and Inspections

When installing a drainage system, it’s important to comply with local regulations. You should also have your system inspected to ensure it meets safety standards.

Some key regulations and inspections include:

  • Basement floor drain: You may need to install a floor drain if you have a basement. This helps prevent water damage in case of flooding.
  • Network of pipes: Your drainage system should be designed to prevent cross-connections between the stormwater drain and the sewer line.
  • Rainwater: If you’re collecting rainwater for reuse, you need to ensure that it’s not contaminated with sewage or other pollutants.

By considering these design factors and complying with regulations and inspections, you can ensure that your drainage system is effective and safe for your household.

What Type of Plumbing Do Most Houses Have? A Comprehensive Guide

“When it comes to plumbing, the type of pipes used in a house can affect the overall efficiency, safety, and cost of the plumbing system. Understanding what type of plumbing your house has can help you make informed decisions about maintenance, repairs, and upgrades.” said Dean Owens of Plumber Warragul.

In this article, we will explore the most common types of plumbing found in houses and their advantages and disadvantages.

A typical suburban house with a main water line connected to a network of pipes leading to sinks, toilets, and showers

Most houses in Australia have a plumbing system that consists of a network of pipes that supply water, remove sewage and wastewater, and provide gas for appliances.

The water supply system is usually made up of copper pipes, which are durable, corrosion-resistant, and easy to install. Copper pipes are also great for hot water systems, as they can withstand high temperatures.

Sewage and wastewater are typically removed through a drainage system that uses PVC pipes. PVC pipes are lightweight, affordable, and resistant to chemicals and corrosion.

Gas supply systems are also common in houses, and they use pipes made of materials such as copper, steel, or plastic.

Copper pipes are the most popular choice for gas supply systems, as they are durable and resistant to corrosion. Steel pipes are also used for gas supply systems, but they are more prone to corrosion and require regular maintenance.

Plastic pipes are not recommended for gas supply systems, as they can degrade over time and leak gas.

Types of Plumbing Pipes

When it comes to plumbing pipes, there are two main types: metal pipes and plastic pipes. Each type has its own advantages and disadvantages, so it’s important to understand the differences before deciding which type to use in your home.

Metal Pipes

Metal pipes, such as copper and galvanized steel, have been used for plumbing for many years.

Copper pipes are known for their durability and corrosion resistance, making them a popular choice for water pipes.

Galvanized steel pipes are also durable and are often used for outdoor plumbing.

However, metal pipes can be more expensive and difficult to install than plastic pipes. They are also less flexible, which can make them harder to work with in tight spaces.

Rigid copper pipes, for example, require specialized tools to bend and shape.

Plastic Pipes

Plastic pipes, such as PVC, ABS, PEX, and CPVC, have become increasingly popular in recent years.

They are lightweight and flexible, making them easy to install and work with. Plastic pipes are also more affordable than metal pipes, making them a cost-effective choice for many homeowners.

PVC pipes are commonly used for drainage and waste systems, while PEX pipes are best for supply lines for hot and cold water in homes.

ABS pipes are also used for drainage systems, while CPVC pipes are often used for hot water supply lines.

One of the main advantages of plastic pipes is their resistance to corrosion. Unlike metal pipes, plastic pipes do not rust or corrode over time. However, they may not be as durable as metal pipes and may have a shorter lifespan.

Plumbing System Applications

Water Supply and Drainage

The plumbing system in most houses consists of two main systems: the water supply system and the drainage system.

The water supply system provides potable water to the house, while the drainage system removes wastewater from the house.

The water supply system is responsible for delivering hot and cold water to all the sinks, toilets, and showers in the house.

The water supply lines are made of different materials, including copper, PEX, and PVC.

Copper pipes are durable, long-lasting, and resistant to corrosion, making them the most commonly used type of internal plumbing in Australia.

PEX pipes are also popular in Australia because they are flexible, easy to install, and affordable. PVC pipes are often used for drain and vent systems, but they can also be used for water supply lines.

It is important to ensure that the water supply system is installed in compliance with local building codes.

Local building codes dictate the layout of the water supply lines, the materials used, and the installation requirements.

It is recommended to hire a professional plumber or contractor to install the water supply system to ensure that it is installed correctly and in compliance with local building codes.

The drainage system is responsible for removing wastewater from the house.

Drain lines are connected to sinks, toilets, and other plumbing fixtures and are designed to carry wastewater to the sewer or septic system.

The drainage system must be installed to ensure that there are no leaks or blockages that could cause sewer gases to enter the house.

Specialised Systems

In addition to the water supply and drainage systems, there are also specialised plumbing systems that are designed for specific applications.

For example, hydronic heating systems and radiant floor heating systems use copper pipes to circulate hot water through the house to provide heat. Meanwhile, irrigation systems use PVC pipes to deliver water to the garden or lawn.

It is important to ensure that specialised plumbing systems are installed correctly and in compliance with local building codes. To do this, you should hire a professional plumber or contractor like Plumber Warragul who has experience in installing specialised plumbing systems.

The water supply system is responsible for delivering hot and cold water to all the sinks, toilets, and showers in the house.

Meanwhile, the drainage system removes wastewater from the house.

https://en.wikipedia.org/wiki/ProfessionalIt is important to ensure that the plumbing system is installed in compliance with local building codes and that a professional plumber or contractor is hired to install the system.

What are the Two Main Types of Cool Roof Coatings? A Comprehensive Guide

If you’re looking to reduce your energy bills and make your home more sustainable, you may have heard of cool roof coatings. These specialized coatings are designed to reflect sunlight and reduce the amount of heat absorbed by your roof. This can help keep your home cooler and more comfortable. But what are the two main types of cool roof coatings, and how do they work? Let us know it with David Spade of Star Roofing West Palm Beach.

coated cool roof

The two main types of cool roof coatings are single-ply thermoplastics and single-ply EPDM (Ethylene Propylene Diene Monomer). Single-ply thermoplastics are made from a variety of plastic materials, including PVC, TPO, and PIB. These materials are highly reflective and can help reduce the amount of heat absorbed by your roof.

Single-ply EPDM, on the other hand, is made from a synthetic rubber material that is also highly reflective.

Both types of cool roof coatings are designed to reflect sunlight and reduce the amount of heat absorbed by your roof. This can help reduce your energy bills and make your home more comfortable, especially during the hot summer months. Additionally, cool roof coatings can help reduce the urban heat island effect. This is a phenomenon where urban areas tend to be significantly hotter than surrounding rural areas due to the large amount of heat-absorbing surfaces like roofs and pavement.

Types of Cool Roof Coatings

When it comes to cool roof coatings, there are two main types: reflective coatings and elastomeric coatings. Each type has its own unique benefits and drawbacks, so it’s important to choose the right one for your specific needs.

Reflective Coatings

Reflective coatings are designed to reflect sunlight and heat away from your roof, keeping your building cooler and reducing the amount of energy needed to keep it comfortable. These coatings are typically made from materials like acrylics, silicone, or polymers, and can be applied as a liquid or a sheet.

Reflective coatings come in a variety of colors, but the most effective ones are white or light-colored, as they reflect the most sunlight. Some coatings also contain reflective pigments or mineral granules to further enhance their solar reflectance.

David Spade of Star Roofing West Palm Beach highlights that “One of the main benefits of reflective coatings is their energy-saving potential. By reducing the amount of heat absorbed by your roof, they can help lower your cooling costs and extend the service life of your roof. Reflective coatings also tend to be more durable and water-resistant than other types of cool roof coatings.”

Elastomeric Coatings

Elastomeric coatings are designed to provide a flexible, waterproof layer of protection for your roof. They are typically made from materials like polyurethane or acrylics, and can be applied as a liquid or a sheet.

Elastomeric coatings are ideal for roofs that experience a lot of movement or expansion, as they can stretch and contract without cracking or peeling. They also provide excellent thermal emittance, which means they can radiate heat away from your roof and keep your building cooler.

One of the main benefits of elastomeric coatings is their durability. They can withstand harsh weather conditions and are resistant to water, mold, and mildew. However, they tend to be less reflective than other types of cool coatings, which means they may not be as effective at reducing your energy costs.

Application and Benefits

Energy Savings and Efficiency

Cool roof coatings can significantly reduce energy costs and improve energy efficiency. By reflecting sunlight and solar heat away from your roof, cool roofing systems help keep your building cooler during the summer months, reducing the need for air conditioning and lowering peak energy demand. This results in lower energy costs and improved energy efficiency.

According to the U.S. Department of Energy, cool roofs can reduce peak energy demand by up to 15%, and can lower air conditioning needs by up to 10-15%. This not only saves money on energy bills, but also reduces the strain on energy grids during peak demand periods.

Environmental Impact

Cool roofing systems can also have a positive impact on the environment.

By reducing the amount of solar radiation absorbed by your roof, cool roofs can help mitigate the urban heat island effect. This effect can lead to higher temperatures and decreased air quality in urban areas.

Cool roofs also help reduce greenhouse gas emissions. They do this by lowering energy consumption and improving energy efficiency.

In addition to their environmental benefits, cool roofs can also improve the sustainability of your building.

By reducing energy costs and improving energy efficiency, cool roofs can help lower your building’s carbon footprint and improve air quality.

Cool roofing systems offer a range of benefits, including improved energy efficiency, lower energy costs, reduced peak energy demand, and improved sustainability and environmental impact.

By reflecting sunlight and solar heat away from your roof, cool roofs can help keep your building cooler and more comfortable during the summer months. They also reduce your energy consumption and environmental footprint.